
What is a workload identity?#
This can be confusing, so I’m going to try to keep our discussion simple. Let’s start with a definition from Microsoft’s Entra Workload Identity Documentation.
A workload identity is an identity you assign to a software workload (such as an application, service, script, or container) to authenticate and access other services and resources.
OK, whoa, let’s stop right here. Identity? That seems like an abstract way to say “credential.” It is, kind of. Identity is the underlying thing that “owns” a credential, like a character in a movie who possesses a driver’s license.

For “workload identity”, we are talking about made-up identities (not real people) that we want to give the authority to do certain things, and then we will configure our software to use credentials that represent those identities to do those things. It’s like building a bot that uses McLovin’s credit card to buy doughnuts at the corner store.
So while we talk about “identity” abstractly, in practice, what we’re really talking about are “credentials” that enable things to be done (where “things to be done” is what some corporate PM decided to calling “workload”).
It’s usually just JWTs#
Most commonly, these credentials are JSON Web Tokens (JWTs) that are created for a workload (things to be done). These JWTs are signed with private keys and verified with public keys that are usually published online as JSON Web Key Sets (JWKS).
| term | definition |
|---|---|
| workload | some stuff to be done |
| identity | an imaginary being who is expected to pay for that stuff and who will be blamed for anything that goes wrong |
| credential | something (typically a JWT) that is used to convince a service provider to do something on behalf of the identity |
How IO uses workload identities#
IO can be configured to use Envoy’s jwt_authn_filter to secure requests to Calling Mode interfaces.
Currently a single JWKS can be specified that, when provided, is used to verify JWT tokens in request headers. Requests without valid JWTs are rejected.
We can use this to verify workload identities from any source that issues JWTs and publishes JWKS urls. For example, this includes GitHub Actions and the verification process is described in detail in this blog post by Gal Schlezinger.
Using a sample token service#
Here we will demonstrate this process end-to-end by creating and deploying a small service that generates tokens.
Here’s how it works:
- Users log in with AT Protocol (Bluesky) accounts.
- Accounts on an allowlist are able to generate and download tokens.
- The generated tokens can be verified with a jwks that the token service publishes.
Here it is in action. I’m running it at tokens.babu.dev.
First, unauthenticated users are redirected to the signin screen:
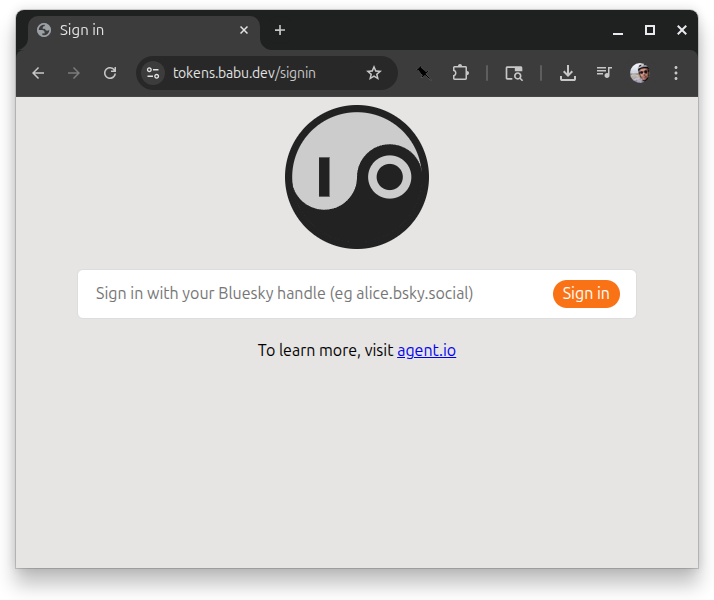
When a user enters a handle and presses the “sign in” button, they are redirected to their PDS to sign in with their password.
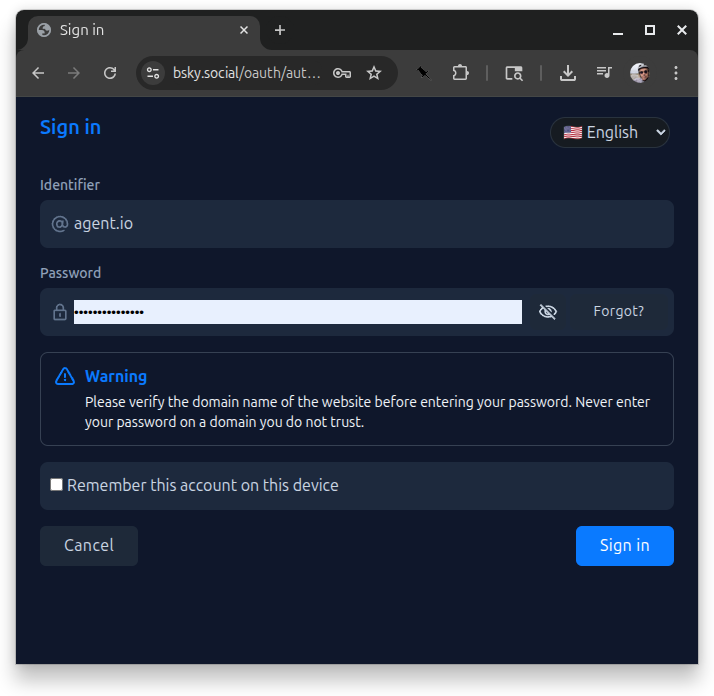
This login is only requesting the atproto scope (identity with no repo access), so when users sign in, they are immediately redirected back to the token server, where they are shown a button that they can use to download a JWT.
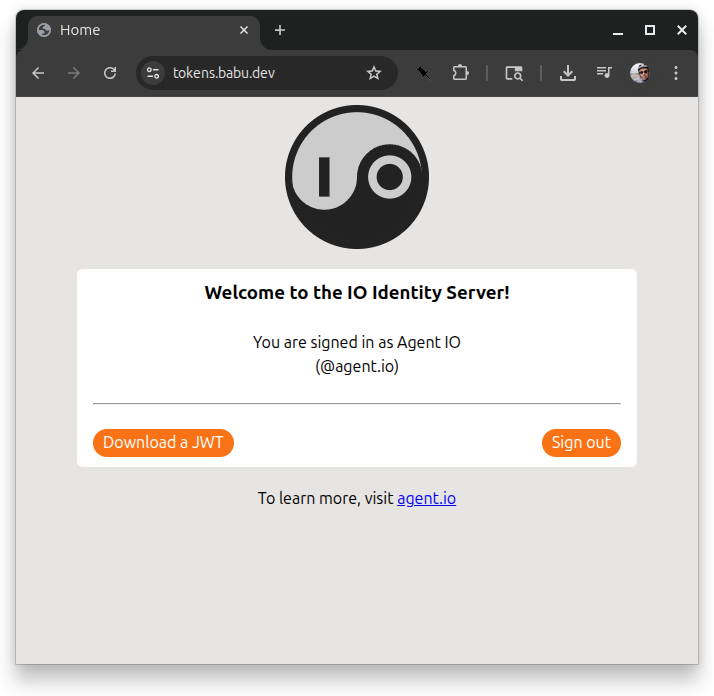
Pressing “Download a JWT” downloads a JWT in a file named token.txt. This token can be verified with a JWKS that the token server publishes. One way to find the JWKS URL is to check /.well-known/openid-configuration:
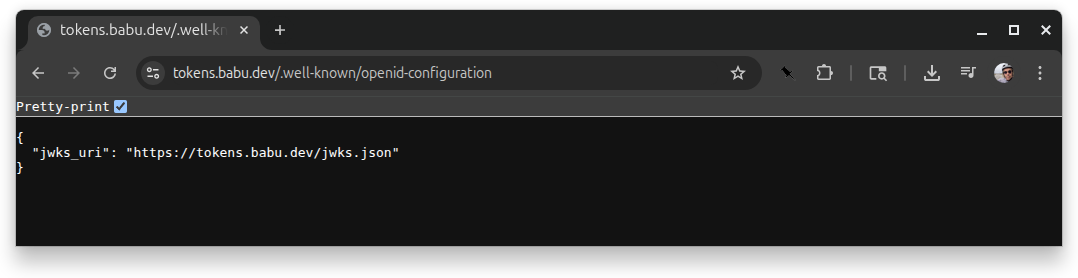
According to this, the JWKS is at /jwks.json:
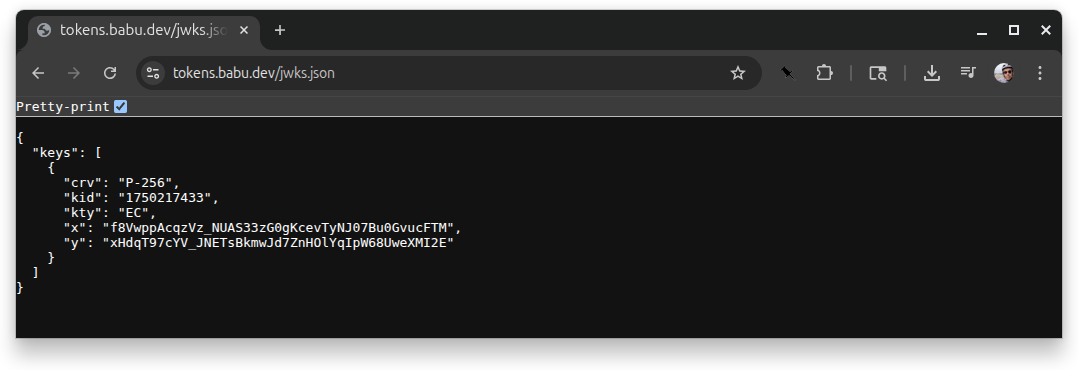
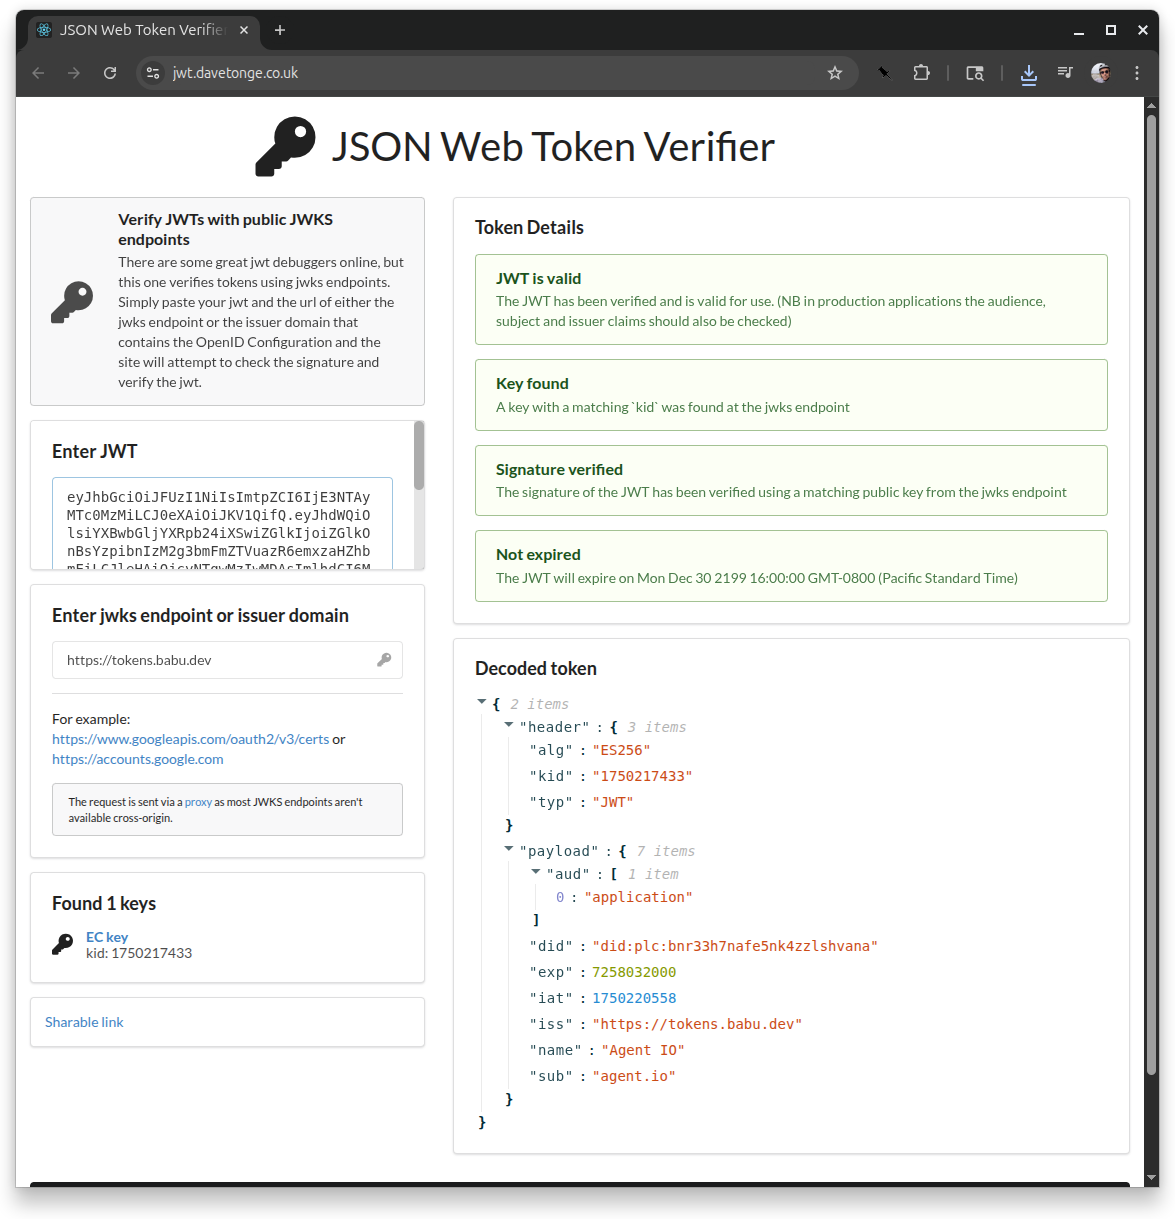
Now we can verify the token with an online token verifier. We’ll use David Tonge’s JSON Web Token Verifier. When we enter our token (copied and pasted from token.txt), the verifier uses the issuer field to look up the OpenID Configuration, which it uses to get the JWKS URL, which it uses to verify our token. Cool, huh?
Inside the token service#
The source code for the token service is on GitHub.
The fun part is below. First, this is the handler for the /generate operation, which checks a header (set by IO) to get the handle of the signed-in user, then it checks to see if that handle is in a slice of approved handles, and if so, it issues a token, which it returns in a text file.
func GenerateHandler(w http.ResponseWriter, r *http.Request) {
	// When a user is signed-in, IO puts their did in this header.
	did := r.Header.Get("user-did")
	if did == "" {
		http.Redirect(w, r, "/signin", http.StatusSeeOther)
		return
	}
	profile, err := bsky.ActorGetProfile(r.Context(), clients.AnonymousClient, did)
	if err != nil {
		log.Printf("%+v", err)
	}
	enrolled := slices.Contains(handles(), profile.Handle)
	if !enrolled {
		http.Error(w, "unauthorized", http.StatusUnauthorized)
		return
	}
	host := r.Host
	token, err := bureau.Issue(profile.Handle, profile.Did, *profile.DisplayName, host, 90)
	if err != nil {
		log.Printf("%+v", err)
	}
	response := token + "\n"
	w.Header().Set("content-disposition", `attachment; filename="token.txt"`)
	w.Write([]byte(response))
}
Here’s the code that issues a token. You could modify this if you wanted to add custom claims.
// Issue a JWT using a local private key
func Issue(handle, did, name, host string, lifetime int) (string, error) {
	b, err := os.ReadFile("privatekey.json")
	if err != nil {
		return "", err
	}
	key, err := jwk.ParseKey(b)
	if err != nil {
		return "", err
	}
	if handle == "" || name == "" {
		return "", errors.New("handle and name must be specified")
	}
	var payload []byte
	token := jwt.New()
	token.Set(jwt.SubjectKey, handle)
	token.Set(jwt.AudienceKey, `application`)
	token.Set(jwt.IssuerKey, "https://"+host)
	token.Set(jwt.IssuedAtKey, time.Now())
	token.Set("name", name)
	if did != "" {
		token.Set("did", did)
	}
	// tokens expire in 24 hours
	exp := time.Now().Add(24 * time.Hour)
	token.Set(jwt.ExpirationKey, exp)
	payload, err = jwt.Sign(token, jwt.WithKey(jwa.ES256(), key))
	if err != nil {
		return "", err
	}
	return string(payload), nil
}
The code in the repo builds a command-line tool called tokens
$ tokens
the agentio/tokens tool

Usage:
  tokens [command]

Available Commands:
  completion  Generate the autocompletion script for the specified shell
  help        Help about any command
  key         create and manage JWKs
  serve       run the token server
  token       create and manage JWTs

Flags:
  -h, --help   help for tokens

Use "tokens [command] --help" for more information about a command.
Running tokens serve runs the server. The server expects two local files.
| file | explanation |
|---|---|
privatekey.json | the private key for the token generator. A key can be generated with tokens key generate. |
users.json | A list of handles that identifies the users who are allowed to generate tokens. |
Here’s a sample users.json file:
[
  "agent.io"
]
Running the token service#
The token service running at tokens.babu.dev is running on a DigitalOcean droplet in a single-node Nomad cluster behind IO. It’s using the agentio/tokens image on DockerHub.
The image is just an Alpine container with the tokens binary configured to run in a directory called /data. Our Nomad configuration maps this directory to a Nomad host volume.
FROM golang:1.24.4 AS builder
WORKDIR /app
COPY . ./
RUN CGO_ENABLED=0 GOOS=linux go build -v -o tokens .

FROM alpine:latest
RUN apk add --no-cache ca-certificates
COPY --from=builder /app/tokens /usr/local/bin/tokens
RUN mkdir /data
WORKDIR /data
ENTRYPOINT ["/usr/local/bin/tokens"]
CMD ["serve"]
Here’s the Nomad job configuration:
job "tokens" {
  datacenters = ["dc1"]
  type = "service"
  group "tokens" {
    count = 1
    network {
      port "http" { to = 3000 }
    }
    service {
      name = "tokens"
      provider = "nomad"
      port  = "http"
    }
    volume "tokens" {
      type      = "host"
      read_only = false
      source    = "tokens"
    }
    task "tokens" {
      driver = "docker"
      config {
        image = "agentio/tokens:latest"
        ports = ["http"]
        force_pull = true
      }
      volume_mount {
        volume = "tokens"
        destination = "/data"
        read_only = false
      }
    }
  }
}
Note that this requires a host volume! To create that, add this inside the client block of /etc/nomad.d/nomad.hcl on your droplet and restart Nomad with systemctl restart nomad.
  host_volume "tokens" {
    path = "/srv/nomad/tokens"
    read_only = false
  }
Here’s the IO configuration. I uploaded it to my IO with scp -P 2200 remote.hcl babu.dev:. Since we’re not making any authenticated calls to a PDS, we only need an ingress.
host "tokens.babu.dev" {
  name    = "Tokens"
  backend = "nomad:tokens"
  atproto {
    name   = "Tokens"
    scopes = ["atproto"]
  }
}
You’ll also need to copy your privatekey.json and users.json to your host volume. For example, here’s how I upload my users.json:
scp users.json root@babu.dev:/srv/nomad/tokens
If you don’t have a droplet and want to try this locally, follow these steps:
- run the token server on your local system,
- use the configuration below in a local instance of IO,
- use the IO TUI to generate a self-signed cert, and
- connect to your server at http://127.0.0.1:9000.
call "tokens" {
  name     = "Tokens"
  port     = 9000
  endpoint = "localhost"
  insecure = true
}

host "localhost" {
  name    = "Tokens"
  backend = "localhost:3000"
  atproto {
    name   = "Tokens"
    scopes = ["atproto"]
    local  = 9000
  }
}
Securing API calls with JWTs and IO#
Now you can go to your IO calling configuration, add your token server’s JWKS URL, and all of your calls to the calling interface will fail unless you add a header with Authorization: Bearer $TOKEN where $TOKEN is a token that you generated from your token site.
Let’s try it. We’ll use the example from A Quick Tour of IO. There we set up an IO serving interface that required an API key and a calling interface that provided it, but that calling interface was open to anyone. Now we’ll use our token server to ensure that only approved callers can use our calling interface.
Here is our starting IO configuration:
serving "keycheck" {
  name    = "Keycheck API"
  port    = 8000
  backend = "internal:httpbin"
  require_apikey {
    users = <<END
hulk:{SHA}Mf6CeupM9fas594sId4LX2t4OFg=
END
  }
}

ingress "localhost" {
  name    = "Keycheck API"
  backend = "serving:keycheck"
}

calling "keycheck" {
  name     = "Keycheck API"
  port     = 4000
  target = "localhost"
  apply_header "api-key" {
    credential = "keycheck"
  }
  insecure = true
}

secret "keycheck" {
  value = "smash"
}
Here’ I’m running IO locally with this configuration, and I’ve generated a self-signed cert for the localhost ingress. That allowed me to make calls like the one below, which uses jq to pick out the User-Name header from the response.
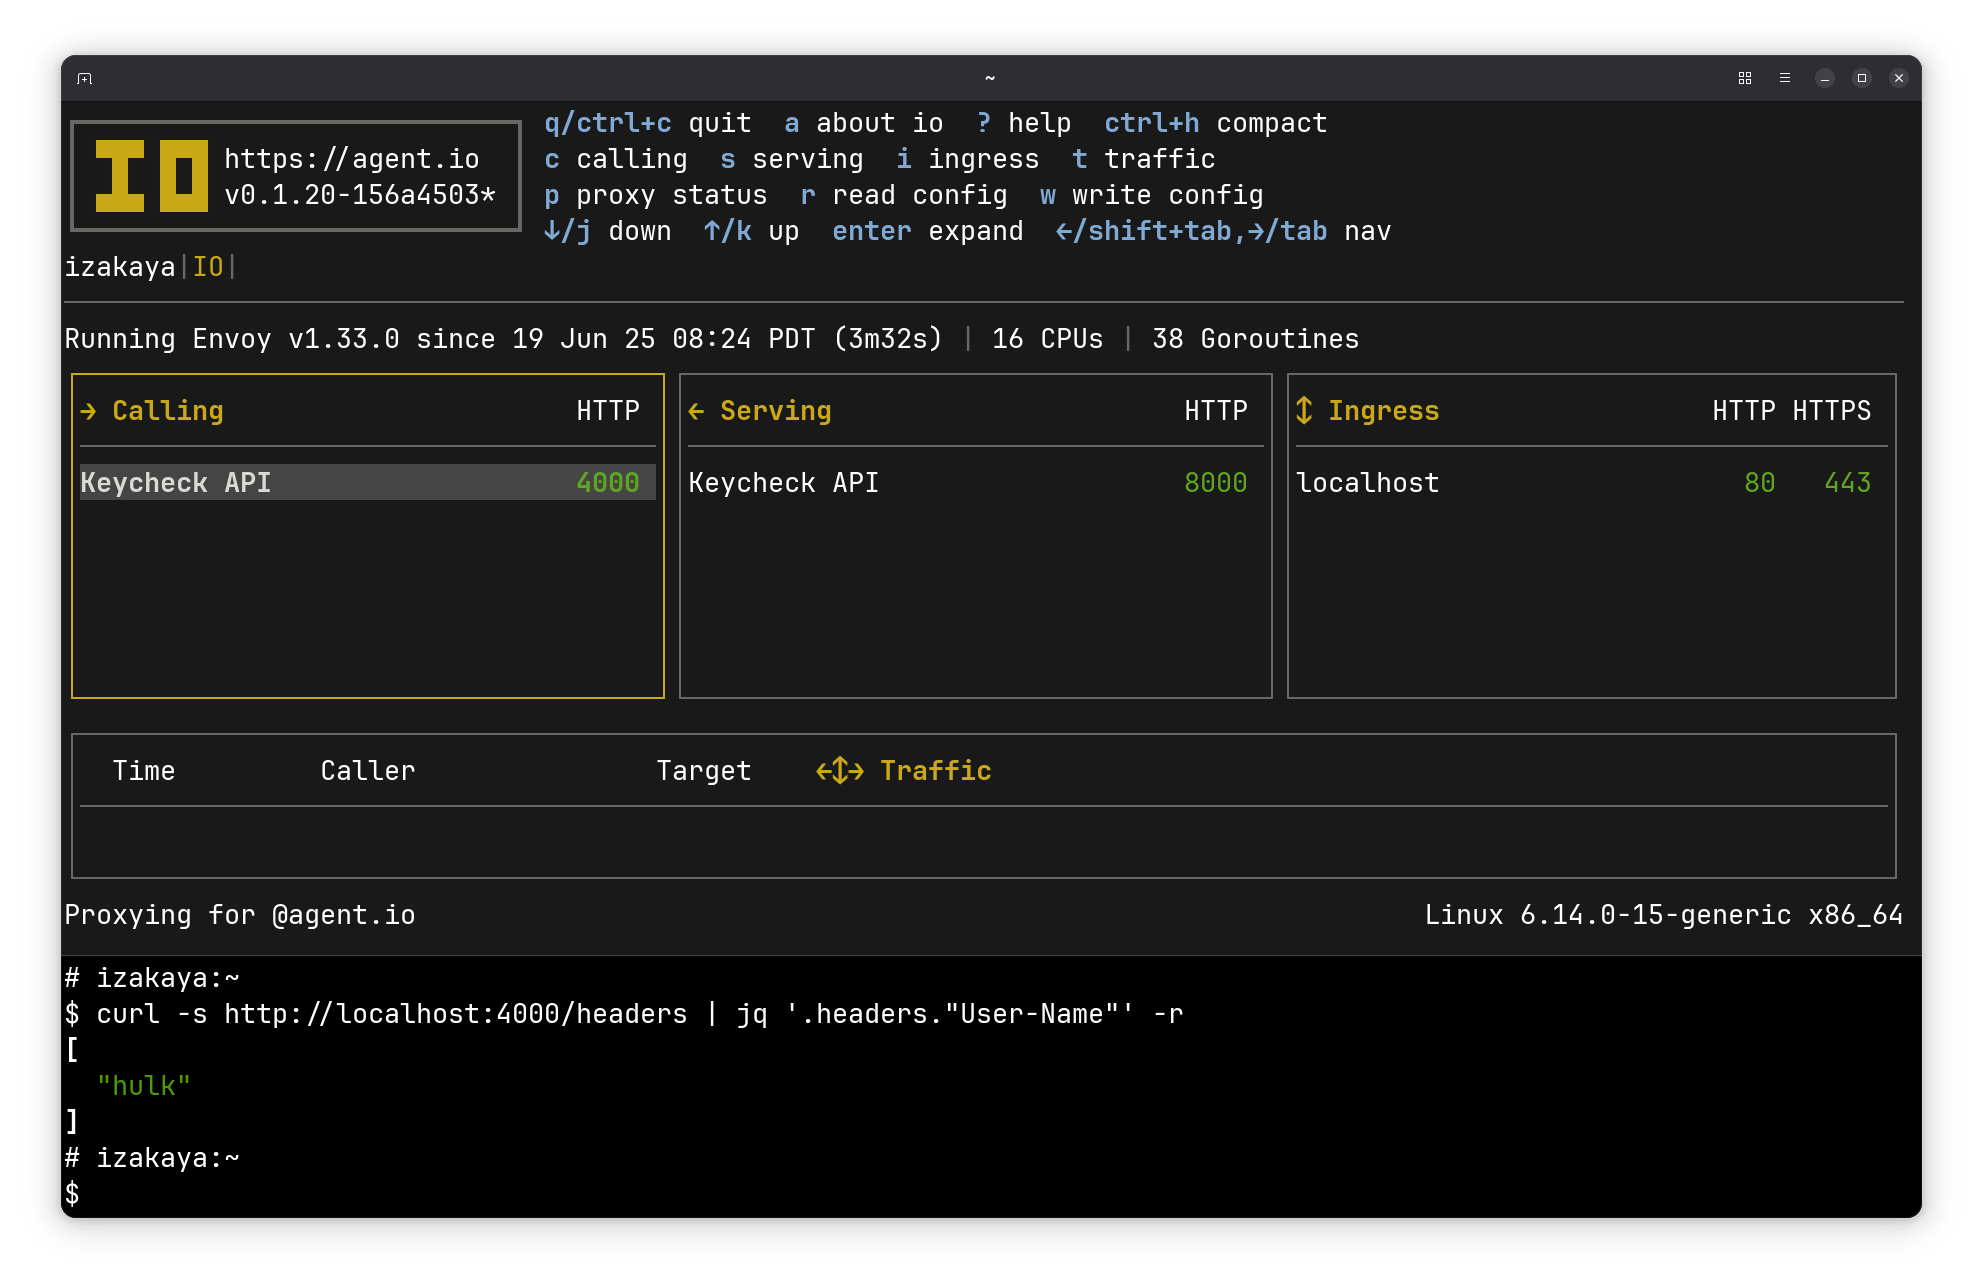
Next I press c to go to the Calling mode screen, press e to edit my calling configuration, and then add the jwks URL for my token service.
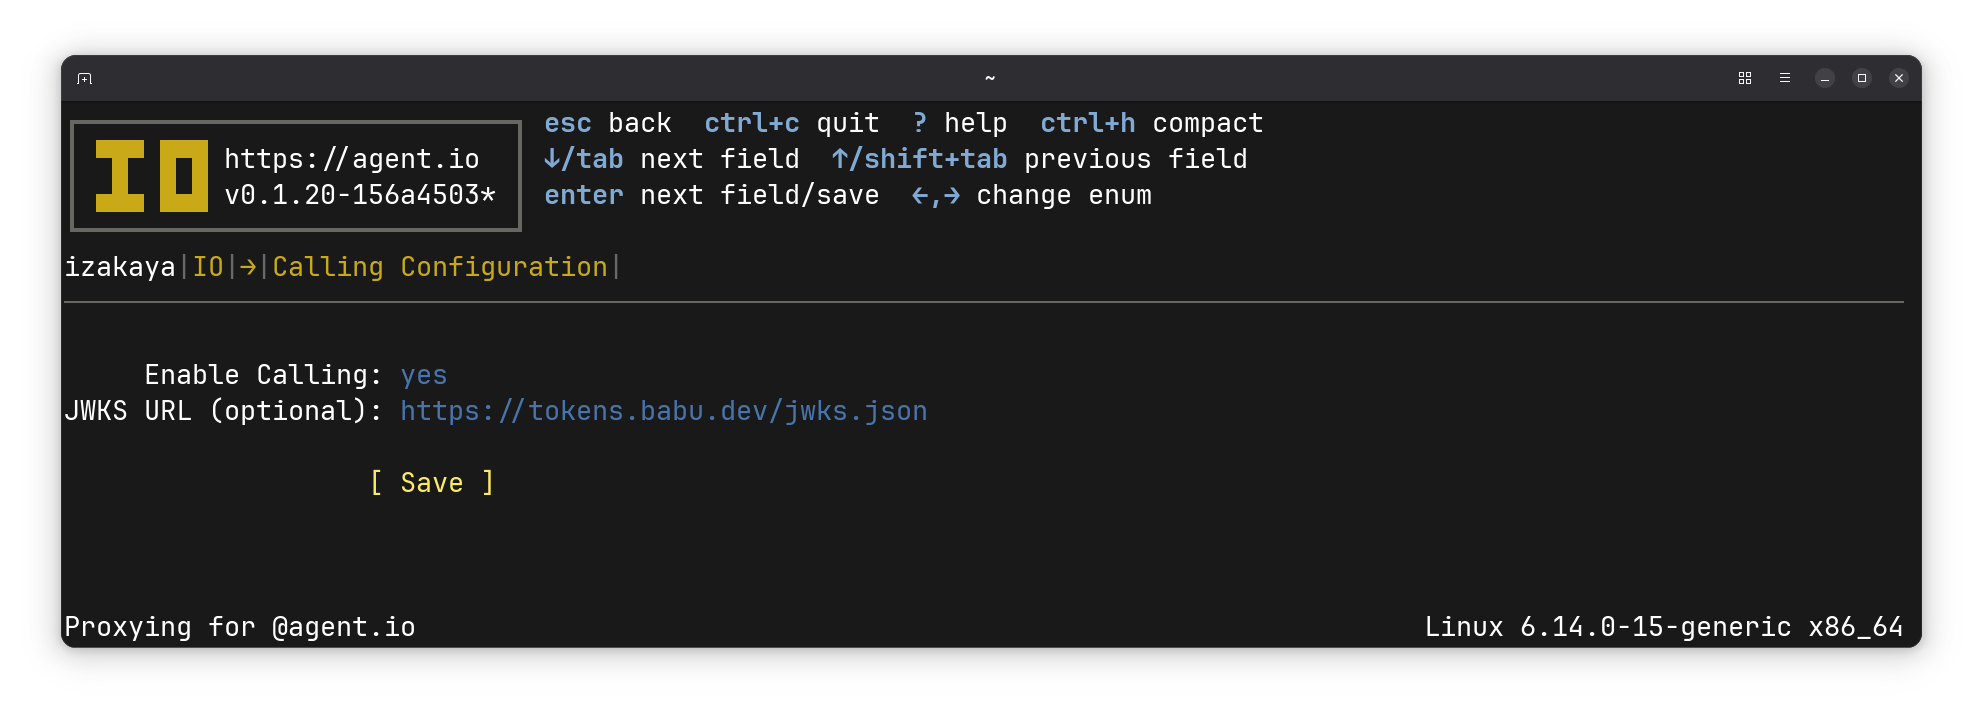
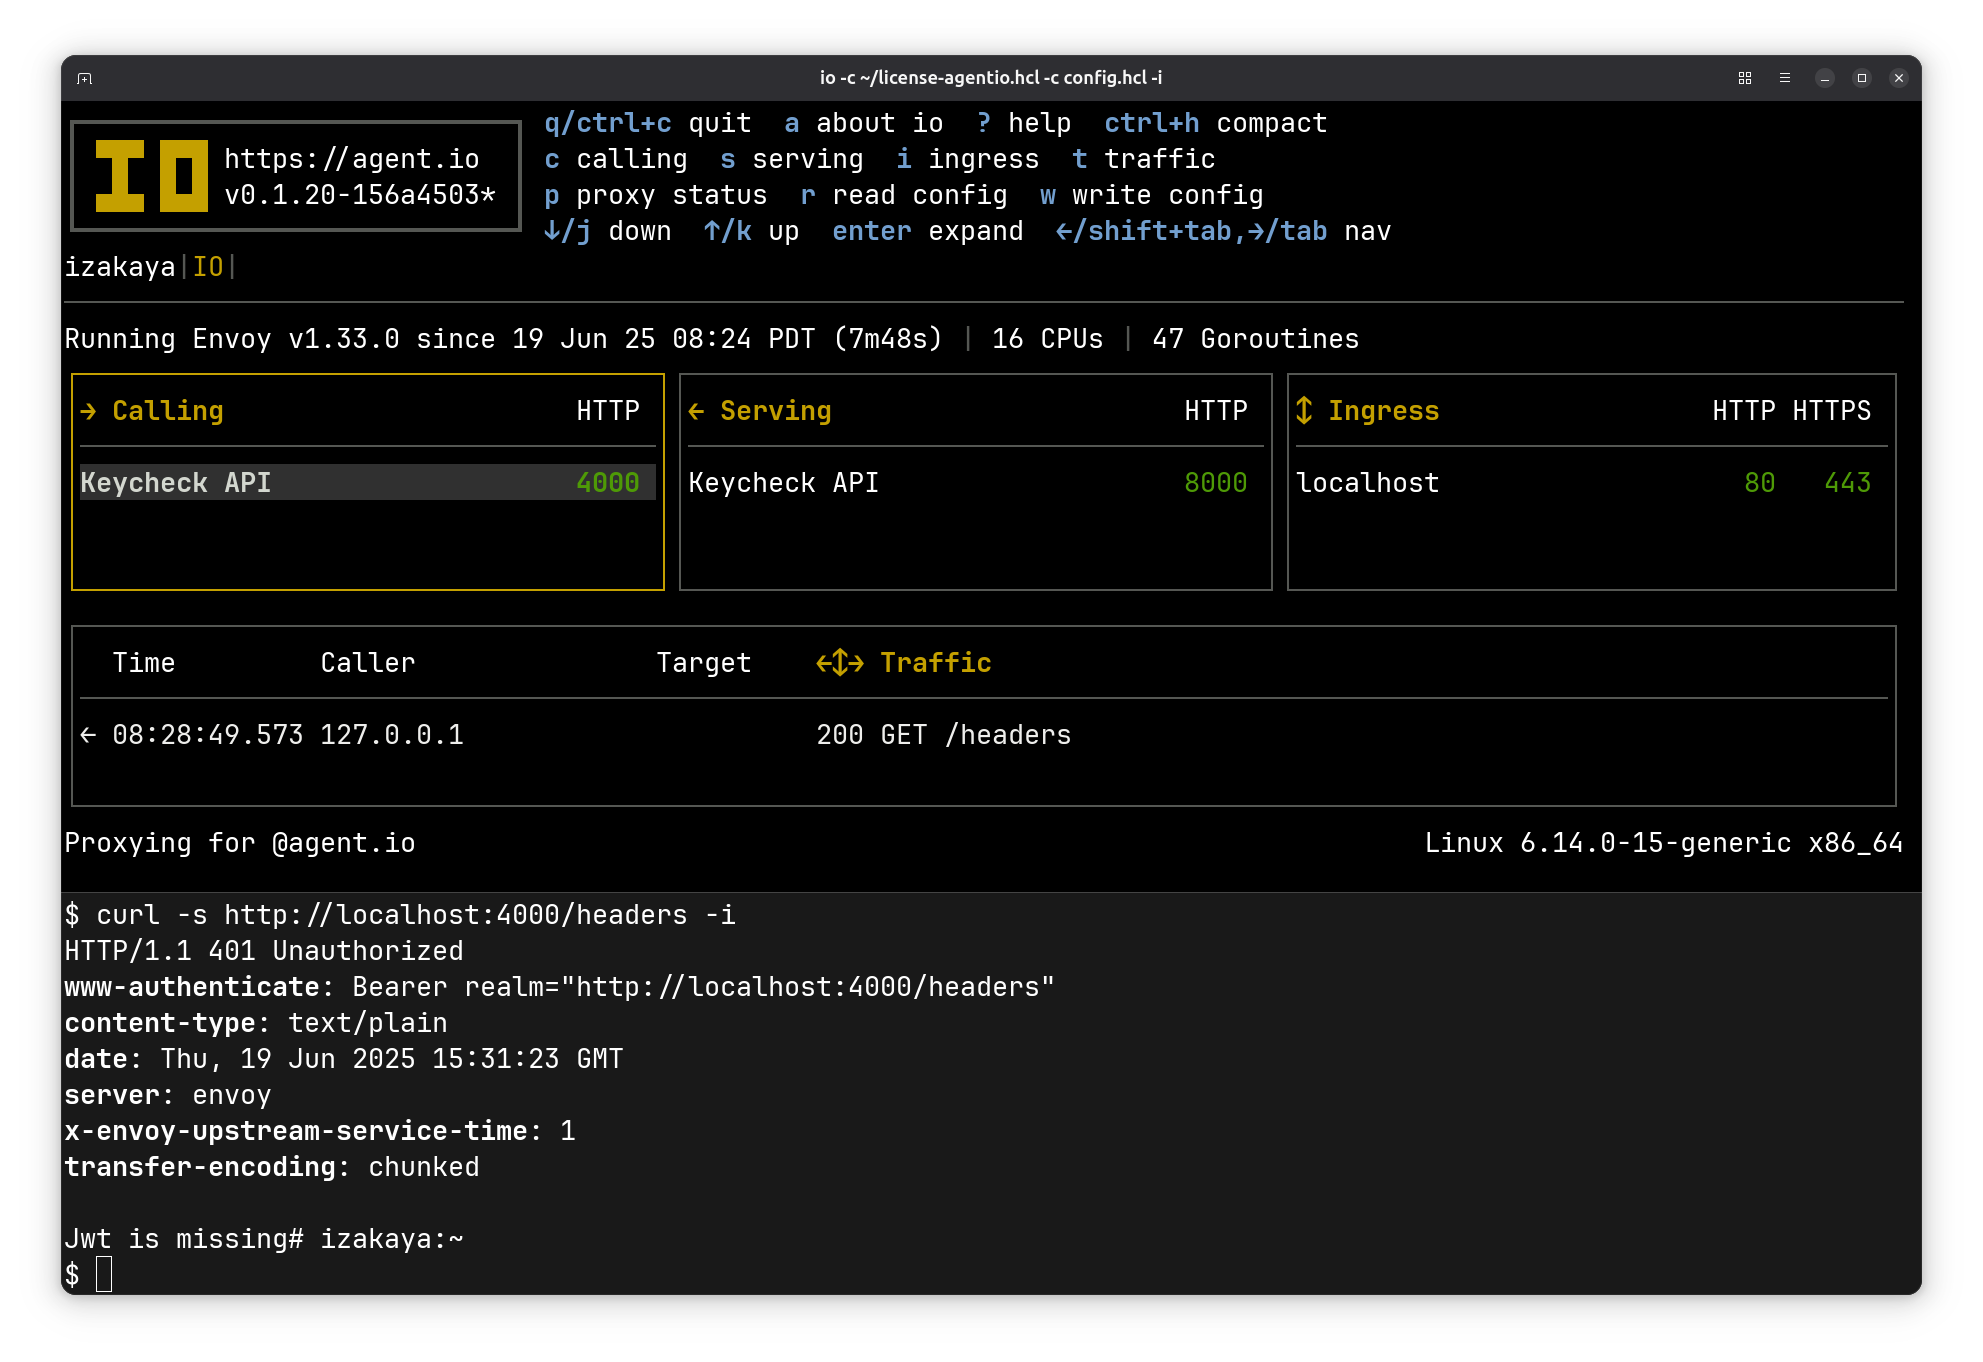
Now when I try to use the calling interface, my requests are blocked.
To make a secure call, I use the token server to download a token, which I’ve set as the value of the JWT environment variable. Now with the curl command below, I can use my calling interface again:
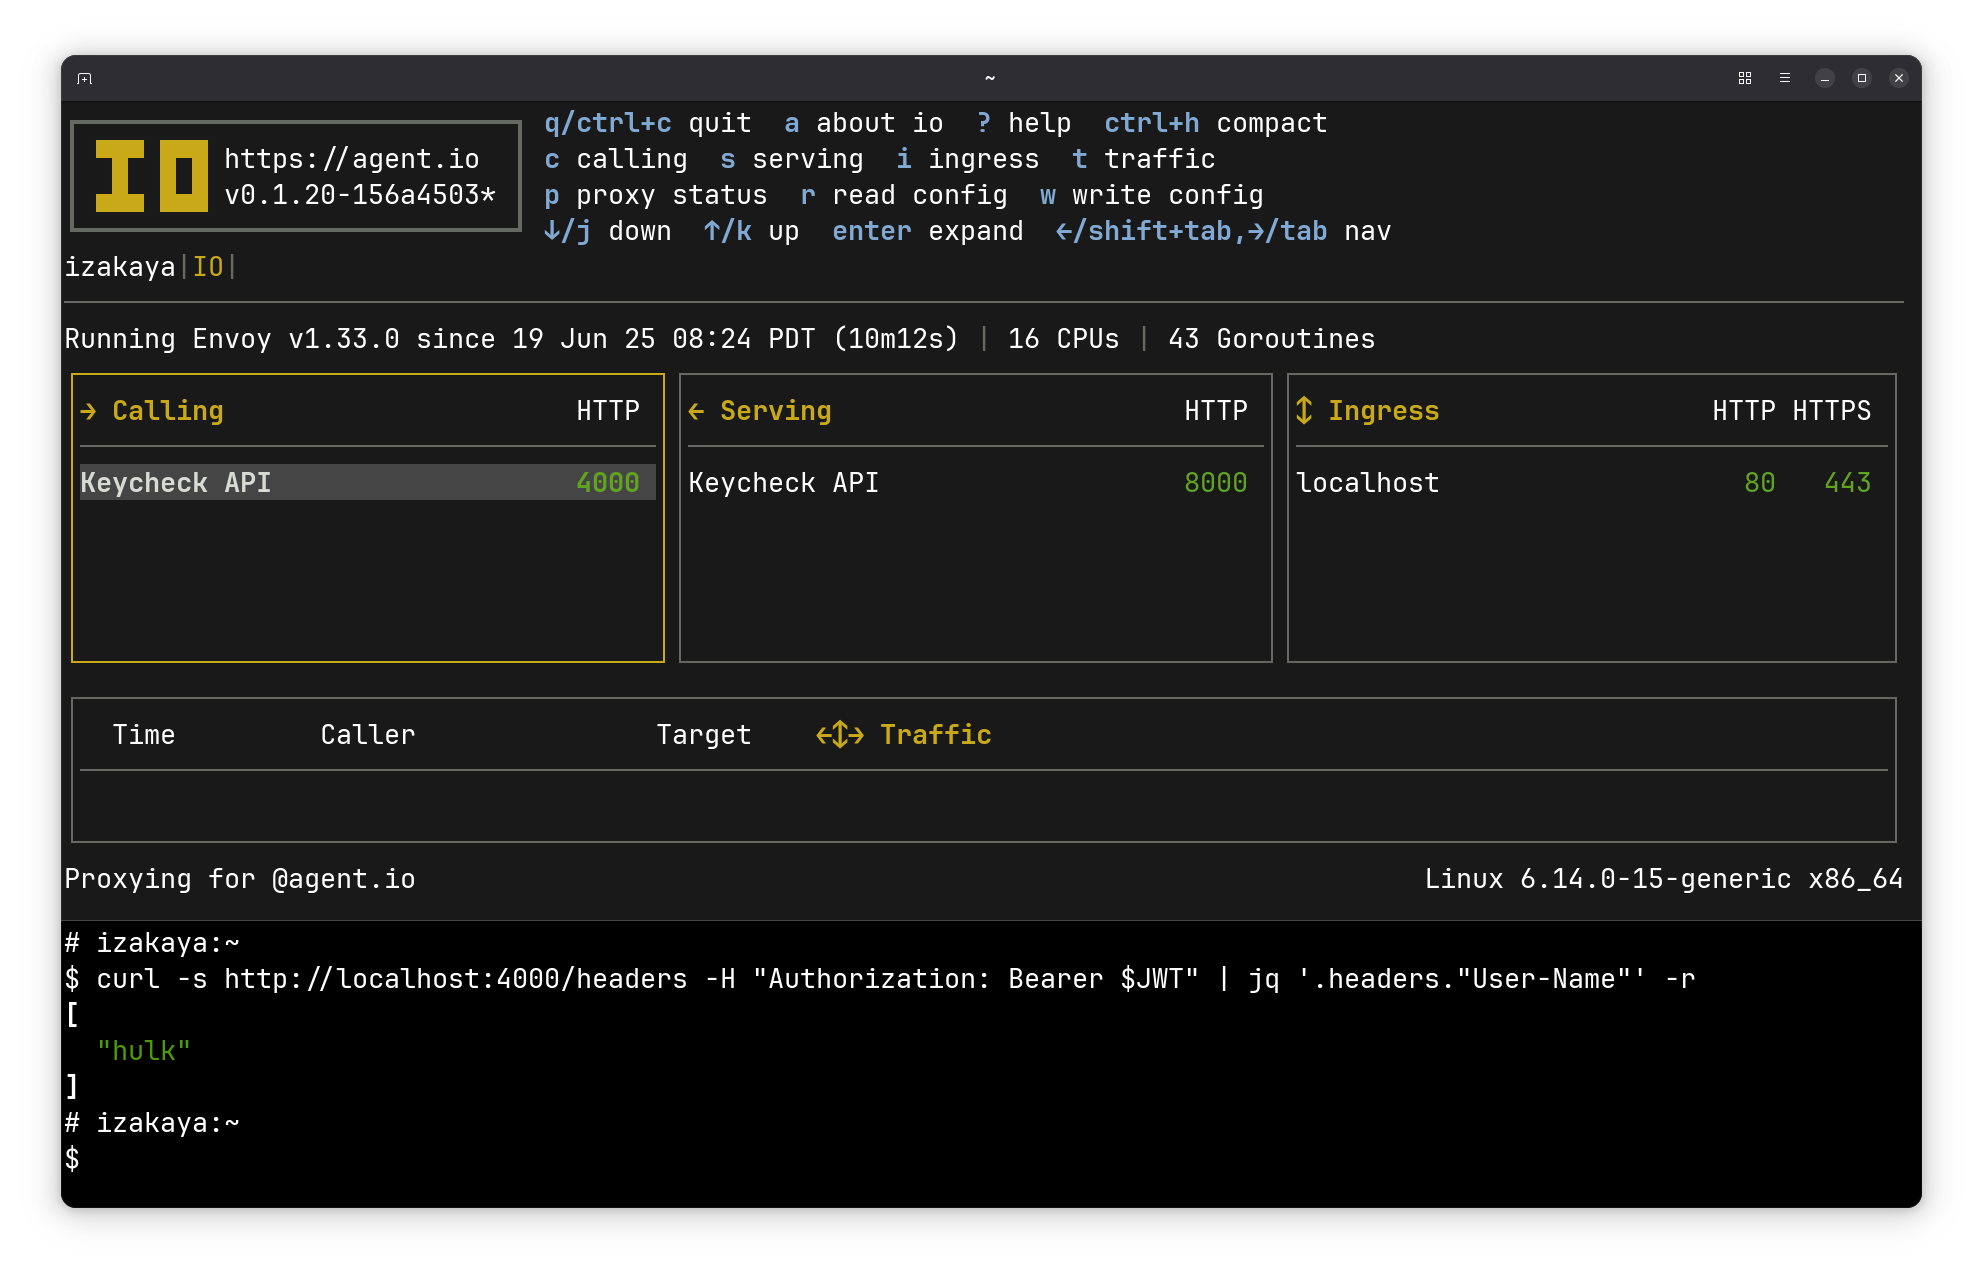
“Wow, so what?” I’ve just replaced one security mechanism (the serving mode API key) with another (the calling mode JWT). But this calling mode JWT is associated with a specific user and can be set to expire whenever I want. I’ve also got a record of API traffic that lets me see exactly what was done with this JWT. With IO and my token server, I can directly and individually control what applications and other users do with my API credentials.
Workload identity with Nomad#
For a final topic, Nomad has the cool built-in ability to generate JWTs for jobs running in a Nomad cluster. When it’s enabled, tokens are passed to jobs in either an environment variable or a special file. If we configure our IO with the JWKS of our local Nomad cluster, we can make our calling interface only allow requests from jobs that authenticate with those tokens, i.e. jobs running in our cluster.
Learn more at Workload Identity in the Hashicorp Nomad documentation.