The Statusphere Example App is a great example for AT Protocol application developers. Described in the Quick start guide to building applications on AT Protocol, it covers many important topics:
- Authenticating users with AT Proto
- Using user credentials to read and write records in their repos
- Using a custom Lexicon type
- Subscribing to the firehose to detect activity in the Atmosphere
The example is written in Javascript, and if you're a Node developer, you might find that it's easy to adapt it as you make new AT Protocol applications. If you work in some other language, you have some work to do: understanding and translating the application code, digging through the external dependencies that handle authorization and API calling, and maybe working directly through the ATProto auth spec.
If you work in multiple languages, you might find yourself doing this repeatedly. How could we make this simpler?
Simplifying the Statusphere
This post describes a Go implementation of the Statusphere app that uses IO to handle authentication and API calling. It also includes some simplifications that we can make when we use AT Protocol at the Lexicon level: without needing to deal with CBOR, CAR files, and the structure of repositories.
The code is on GitHub and we'll discuss it here in detail.
An instance is running at statusphere.babu.dev.
Running the Statusphere app on our droplet
First we'll describe how to run the agentio/statusphere app on a droplet like the one described in Droplet Superpowers.
If you just want to know how the code works, skip to the next section.
What's in the Docker image?
The repo contains a Dockerfile that is used to build images published as agentio/statusphere on Docker Hub.
The Dockerfile itself is very simple. It just builds the app binary and copies it into an Alpine image.
FROM golang:1.25.1 AS builder
WORKDIR /app
COPY . ./
RUN CGO_ENABLED=0 GOOS=linux go build -v -o statusphere .

FROM alpine:3
RUN apk add --no-cache ca-certificates
COPY --from=builder /app/statusphere /usr/local/bin/statusphere
RUN mkdir /data
WORKDIR /data
ENTRYPOINT ["/usr/local/bin/statusphere"]
CMD ["statusphere"]
Running the statusphere app in Nomad
Here's the HCL job description that configures Nomad to run our app.
job "statusphere" {
  datacenters = ["dc1"]
  type = "service"
  group "statusphere" {
    count = 1
    network {
      port "http" { to = 3000 }
    }
    service {
      name = "statusphere"
      provider = "nomad"
      port  = "http"
    }
    volume "statusphere" {
      type      = "host"
      read_only = false
      source    = "statusphere"
    }
    task "statusphere" {
      driver = "docker"
      config {
        image = "agentio/statusphere:latest"
        ports = ["http"]
      }
      volume_mount {
        volume = "statusphere"
        destination = "/data"
        read_only = false
      }
      env {
        ATPROTO_PROXY = "http://10.124.0.2:7000"
      }
    }
  }
}
The ATPROTO_PROXY environment variable is something that you'll need to customize. It should be the address of the machine running your IO. Keep the port the same unless you change the IO calling configuration (below).
The job configuration includes a volume mount for the directory where the app will keep a SQLite file of statuses that it observes from watching the firehose. You'll need to define that by adding the following to the client section of your /etc/nomad.d/nomad.hcl file.
  host_volume "statusphere" {
    path = "/srv/nomad/statusphere"
    read_only = false
  }
Make sure that this directory exists:
mkdir -p /srv/nomad/statusphere
After you've done all this, restart Nomad with systemctl restart nomad.
Configuring IO for AT Protocol
There are two things that we need to do to configure IO to support AT Proto signin.
First, we add an atproto block to our ingress host declaration. This one specifies the name of the app (this will appear in client metadata) and the scopes that we want to request for our backend app.
ingress "statusphere.babu.dev" {
  name    = "statusphere"
  backend = "nomad:statusphere"
  atproto_client {
    name   = "Statusphere"
    scopes = ["atproto", "transition:generic"]
  }
}
Next we're going to add a calling interface for AT Protocol API requests. We do this in IO by setting the endpoint of the calling interface to the "magic" value of @. You'll also see a list of operations. These are optional and are included because they improve the logging of operations in IO traffic views.
calling "atproto" {
  name     = "ATProto"
  port     = 7000
  target   = "@"
  operation "ListRecords" {
    method      = "GET"
    path        = "/xrpc/com.atproto.repo.listRecords"
    description = "List records in a repo"
  }
  operation "GetProfile" {
    method      = "GET"
    path        = "/xrpc/app.bsky.actor.getProfile"
    description = "Get a user's profile"
  }
  operation "CreateRecord" {
    method      = "POST"
    path        = "/xrpc/com.atproto.repo.createRecord"
    description = "Create a record in a repo"
  }
}
What's with that @ backend? Typically a calling interface points to a specific upstream server. For AT Protocol, that upstream server is determined dynamically for each user -- it's that user's PDS.
Inside the code
Now let's dig into the code. If you skipped the previous section, you might eventually want to go back and look at the IO configuration, but let's press on!
Authenticating users
First, our simplified Statusphere app doesn't do any user signin. Instead it relies on IO for that. IO handles auth by intercepting a set of paths under the site root, all of them beginning with /@/.
/@/signin |
handles signin |
/@/client-metadata.json |
the client id |
/@/callback |
the OAuth callback address |
/@/jwks.json |
the jwks for the client |
/@/signout |
signs out the user |
A GET of /@/signin returns a simple signin form, but since the original Statusphere app had its own signin page, our example keeps that and that signin page does a POST to /@/signin with the user's handle.
<title>Sign in</title>
<link rel="stylesheet" href="/public/styles.css">
</head>
<body>
<div id="root">
<div id="header">
<h1>Statusphere</h1>
<p>Set your status on the Atmosphere.</p>
</div>
<div class="container">
<form action="/@/signin" method="post" class="signin-form">
<input type="text" name="handle" placeholder="Enter your handle (eg alice.bsky.social)" required="">
<button type="submit">Sign in</button>
</form>
<div class="signup-cta">
Don't have an account on the Atmosphere?
<a href="https://bsky.app/">Sign up for Bluesky</a> to create one now!
</div>
</div>
</div>
</body></html>
`
IO handles everything from there, locating the correct PDS, redirecting the browser to that PDS's signin page, and handling the callback after the user signs in and approves. After it exchanges the code for an access token, IO redirects the browser back to / (or the value of redirect if that is included in the POST to /@/signin). Now, with a signed-in user, every request that is passed to the application backend has a few additional headers:
User-Did |
The signed-in user's DID |
User-Handle |
The signed-in user's handle |
Proxy-Session |
A session key that can be used to make calling requests |
We'll see how these are used in the next section.
Calling Lexicon APIs
Normally, calling APIs with OAuth is fairly simple: you just get the access token and add it to your requests in the Authorization header. But ATProto adds a twist: clients need to also use DPoP, which essentially means a that client has to sign some extra things with a private key to prove to the server that this is the same client that requested the access token that is being used (whew!). IO already handled part of this when it handled signin: it created and saved a private key for this caller-callee relationship and registered the associated public key with the server when the user signed in.
But now when we make API calls, the client has to do some extra work. It needs to send the server a signature of a small document that contains a few things, including these:
- the current time
- a hash of the access token
- a nonce from the server
This nonce from the server is tricky: the server is free to change it at any time, which means that a request from the client may fail for using an outdated nonce.
If you like coding challenges, getting this working is a fun one! But if that is a distraction on your way to an app, you might prefer to use a proxy that handles this for you. IO's calling interface does this. Your application just makes one call to IO's calling interface and IO computes the necessary annotations, including signatures, and sends them upstream to the user's PDS. If IO's stored nonce has expired, IO uses the server response to update its nonce and then retries the request. The application doesn't have to do anything except wait for its call to the proxy to return.
Here's what that looks like in our example app:
First, from handle_status.go:
	c := froda.NewClientWithOptions(froda.ClientOptions{
		Host: sessionproxy(),
	})
	c.SetSessionHeaders(r)

	input := xrpc.ComATProtoRepoCreateRecord_Input{
		Collection: "xyz.statusphere.status",
This SessionClient is an instance of a Client that we've factored out into a utility repo called agentio/atiquette. We're looking here at client.go:
type Client struct {
	UserAgent *string
	Headers   map[string]string
	Session   string
	Did       string
	Proxy     string
}

func NewClient() *Client {
	return &Client{}
}

func (c *Client) AuthorizedCopy(r *http.Request) *Client {
	nc := *c
	nc.Session = r.Header.Get("proxy-session")
	nc.Did = r.Header.Get("user-did")
	return &nc
}
That client just takes two values from our incoming request headers and copies them to the headers that it sends to IO's calling interface:
	req.Header.Set("proxy-session", c.Session)
	req.Header.Set("user-did", c.Did)

	resp, err := http.DefaultClient.Do(req.WithContext(ctx))
	if err != nil {
		return fmt.Errorf("request failed: %w", err)
	}
IO then uses these headers to look up the appropriate credentials and applies them, retries and all, to the call to the user's PDS.
That's how IO can make it easier to write AT Proto apps.
Using a custom Lexicon type
The next sections address a couple of challenges that have been making things harder for Go developers.
First, the Statusphere app uses a custom lexicon type, xyz.statusphere.status. This is typically handled with code generation: we generate code for all of the lexicon-based methods and structures that we use and compile it into our apps.
Go code is commonly generated with a tool called lexgen in the bluesky-social/indigo repository. This currently has a frustrating circular dependency: the CBOR-handling code can only be generated after the Go data structures have been created, but the Go data structures won't compile unless the CBOR code exists. There are ways to work around this, but you might be scratching your head and asking "CBOR? Where did that come from?" The answer is that CBOR is an important part of the structure of AT Proto repositories, but it's not necessary to use HTTP/JSON-based Lexicon APIs. So why are we generating it? The atiquette repo contains lexgenlite, a reduced version of lexgen that omits the CBOR code.
This generated code also fixes another problem with indigo generated code (oops, now I see this was recently fixed): the code generated with lexgen has a hard-coded dependency on the xrpc client implementation in the indigo repo. This should be an interface! It doesn't take much:
type Client interface {
	Do(context.Context, RequestType, string, string, map[string]interface{}, interface{}, interface{}) error
}
If we instead generate code to use this, we can easily substitute alternate xrpc.Client implementations that authenticate in various ways or not at all, such as when we call APIs that don't require authentication.
Subscribing to the firehose with Jetstream
One important use of CBOR is to decode messages that are read from the firehose. This was necessary until recently, when the Jetstream service appeared. It allows clients to listen for JSON messages and to filter the firehose on the server side to only include specific messages. For a custom app like Statusphere, this is unquestionably the best way to listen to the firehose. Not only is the code really really simple, applications use far less bandwidth.
For our Go version of the Statusphere app, it's all in jetstream.go:
func connect(host string) error {
	u := url.URL{Scheme: "wss", Host: host, Path: "/subscribe", RawQuery: "wantedCollections=xyz.statusphere.status"}
	log.Printf("connecting to %s", u.String())
	c, _, err := websocket.DefaultDialer.Dial(u.String(), nil)
	if err != nil {
		return err
	}
	defer c.Close()
	for {
		_, message, err := c.ReadMessage()
		if err != nil {
			return err
		}
		var m Message
		json.Unmarshal(message, &m)

		if false {
			b, _ := json.MarshalIndent(m, "", "  ")
			log.Printf("%s", b)
		}

		if m.Kind == "commit" {
			log.Printf("%+v\n", m.Commit.Record)

			var status xrpc.XyzStatusphereStatus
			b, _ := json.Marshal(m.Commit.Record)
			err := json.Unmarshal(b, &status)
			if err != nil {
				log.Printf("oops %s", err)
It's not a walk in the park, but it's not bad, either
Making AT Protocol apps still takes some effort, but maybe you'll agree that these simplifications make it a lot easier. It might not be worth it to you if you're working on One Big App, but to someone whose AT Protocol work involves writing lots of different apps and maybe even apps in multiple languages, this saves a lot of trouble.
You can also do things no one would ever think of doing if they didn't have AT Proto auth in a proxy, like replace Basic Auth with AT Proto auth.
Running the Statusphere app locally
If you are wondering "can I do this on my laptop?" the answer is "yes!"
If we're not running on a machine that's reachable with a domain name, we can make some adjustments to our IO configuration and still run the Statusphere app using the Localhost Client Development exception in the AT Protocol OAuth spec.
Here's the IO configuration. First for the ingress, set the hostname to localhost and add local = 9000 to the atproto block. This will cause the client metadata to use 127.0.0.1:9000 as the callback address. You can change 9000 to something else, but you'll need to carry that new port number forward (below).
ingress "localhost" {
  name    = "statusphere"
  backend = "localhost:3000"
  atproto_client {
    name   = "Statusphere"
    scopes = ["atproto", "transition:generic"]
    local  = 9000
  }
}
The AT Proto calling configuration is unchanged:
calling "atproto" {
  name     = "ATProto"
  port     = 7000
  target   = "@"
  operation "ListRecords" {
    method      = "GET"
    path        = "/xrpc/com.atproto.repo.listRecords"
    description = "List records in a repo"
  }
  operation "GetProfile" {
    method      = "GET"
    path        = "/xrpc/app.bsky.actor.getProfile"
    description = "Get a user's profile"
  }
  operation "CreateRecord" {
    method      = "POST"
    path        = "/xrpc/com.atproto.repo.createRecord"
    description = "Create a record in a repo"
  }
}
Finally, add a calling configuration to call the statusphere ingress on localhost from port 9000. This bypasses the ingress hostname requirement (ingress hosts match on host names) so that calls to 127.0.0.1:9000 will go to our backend. Because calling requests currently expect HTTPS backends, you need to also specify insecure = true and generate a self-signed cert for localhost (do this in the IO UI).
calling "statusphere" {
  name = "statusphere"
  port = 9000
  target   = "localhost"
  insecure = true
}
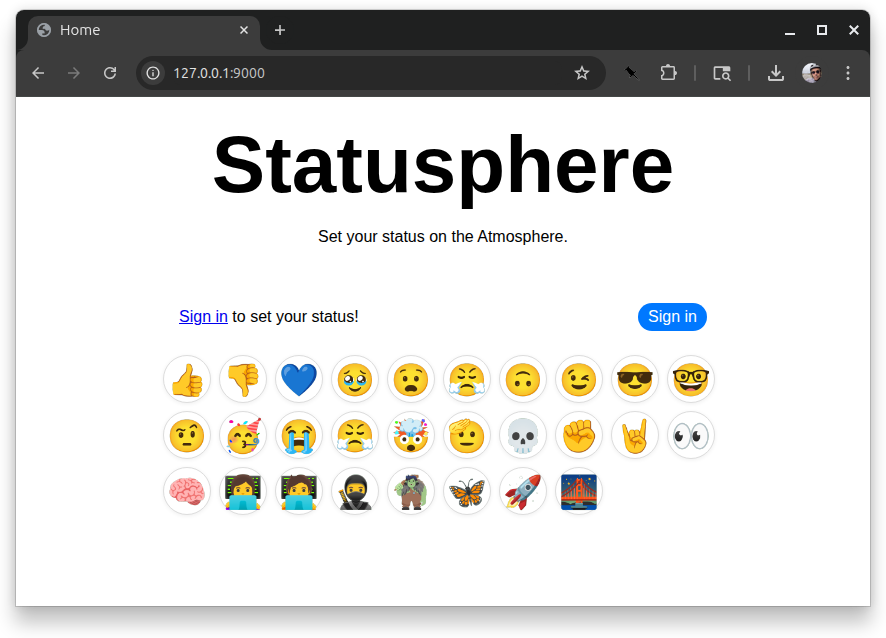
Now visit your site at http://127.0.0.1:9000/. Don't forget to also build and run the agentio/statusphere app!
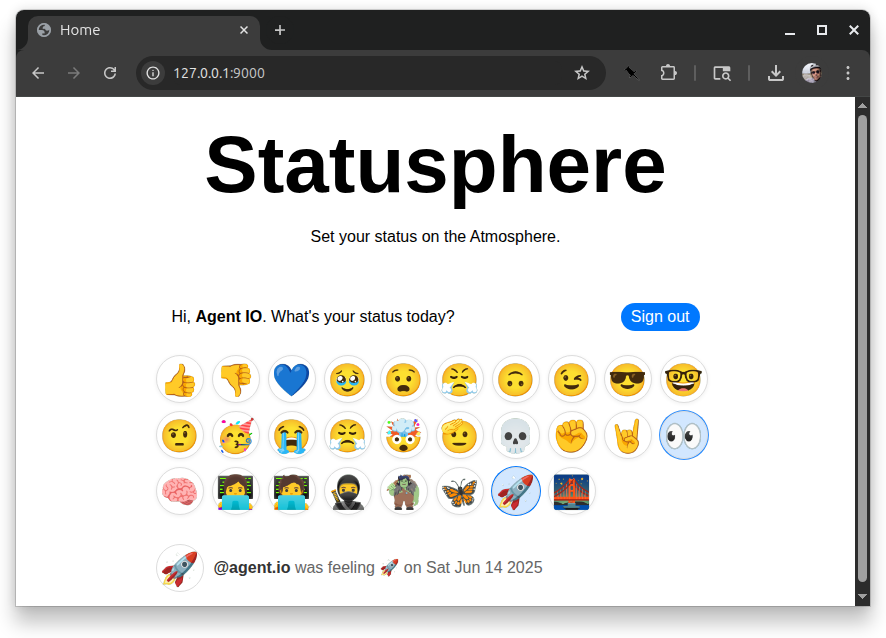
Here's what you can expect. First here is the initial screen that is shown when no one is signed in:
Pressing the "sign in" button takes you to a form where you can enter your handle. I'm signing in with agent.io.
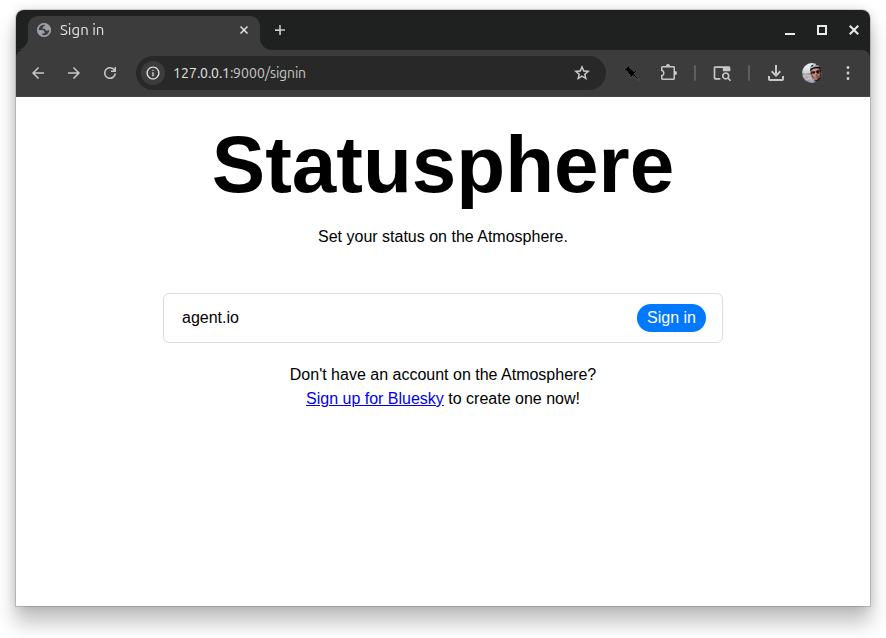
Pressing "sign in" here takes us to our PDS's sign in page.
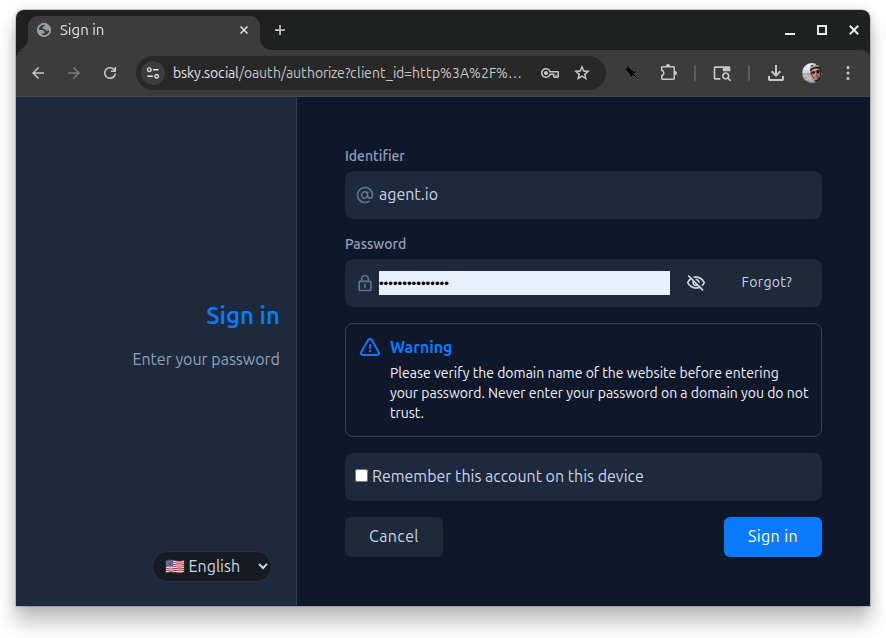
Entering a password and pressing "Sign in" takes us to an "Authorize" page where we see a few details about the app that's requesting our credentials. This says a bit less because it is using the localhost variant of AT Proto login.
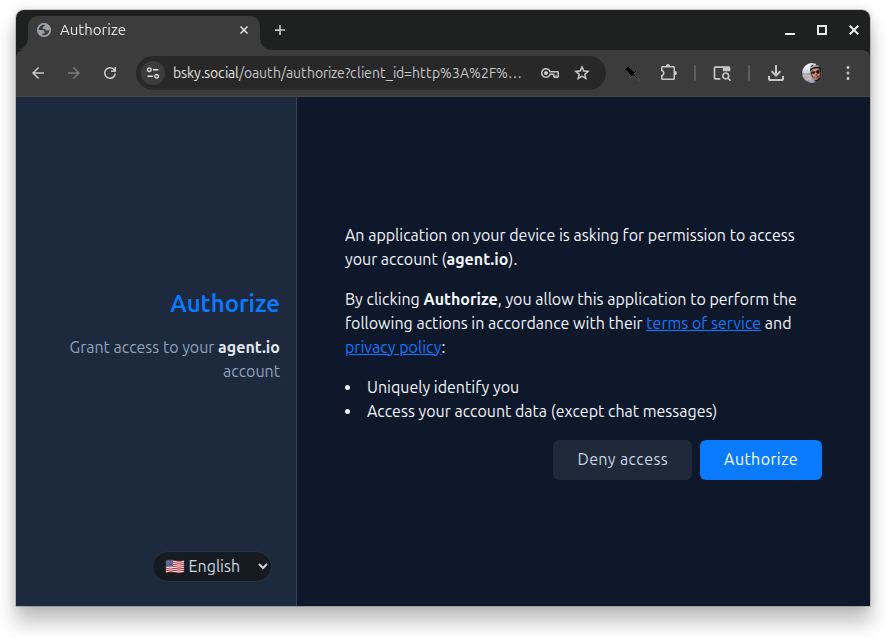
When that's approved, we quickly flash through a page that says "Login complete" and are redirected back to our app where now we see the screen name of the signed-in user.

Pressing any of the buttons sets our status.
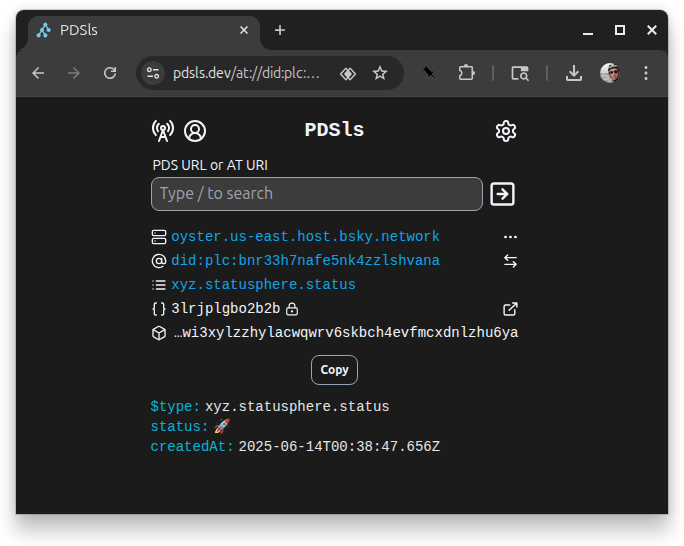
Now go to PDSls and look up the record that we just added!
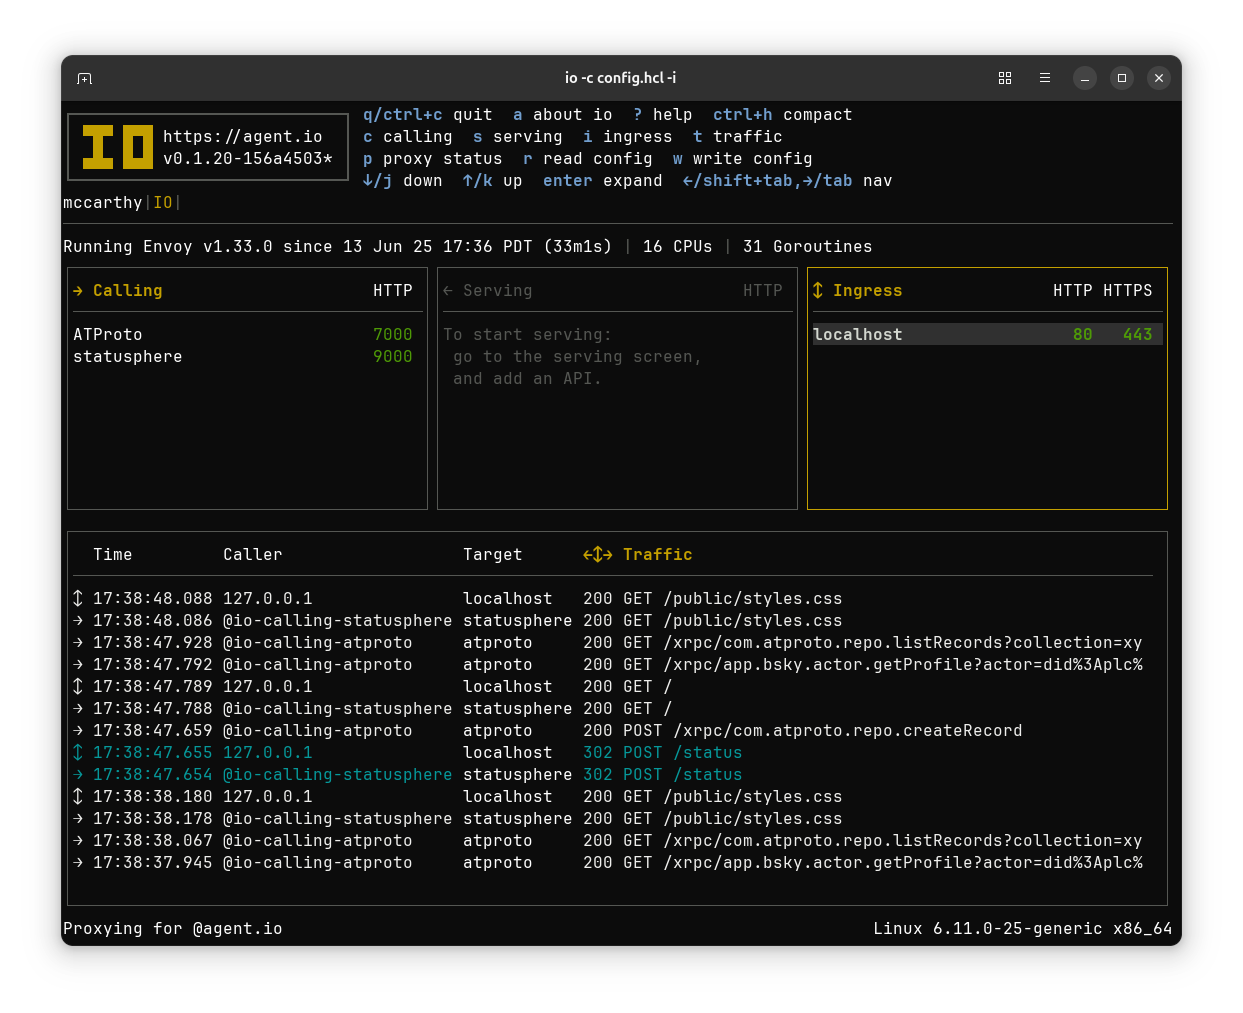
Here's a peek at what you can expect to see in IO after you've run all of this. Traffic observations are at the bottom, and although there wasn't room for it in this post, in a future post, I hope to show how IO traffic observations made it easier to build and debug AT Proto authentication and API calling.
Resources
If you only have time for one video, Devin Ivy's ATmosphere talk is a great one to watch. In it, Devin talks about an SDK for AT Proto, and in another future post (sitting in drafts), I'll talk about how I think of IO as an "out-of-process SDK". But for now, just watch Devin's talk: