
The IO Main Screen#
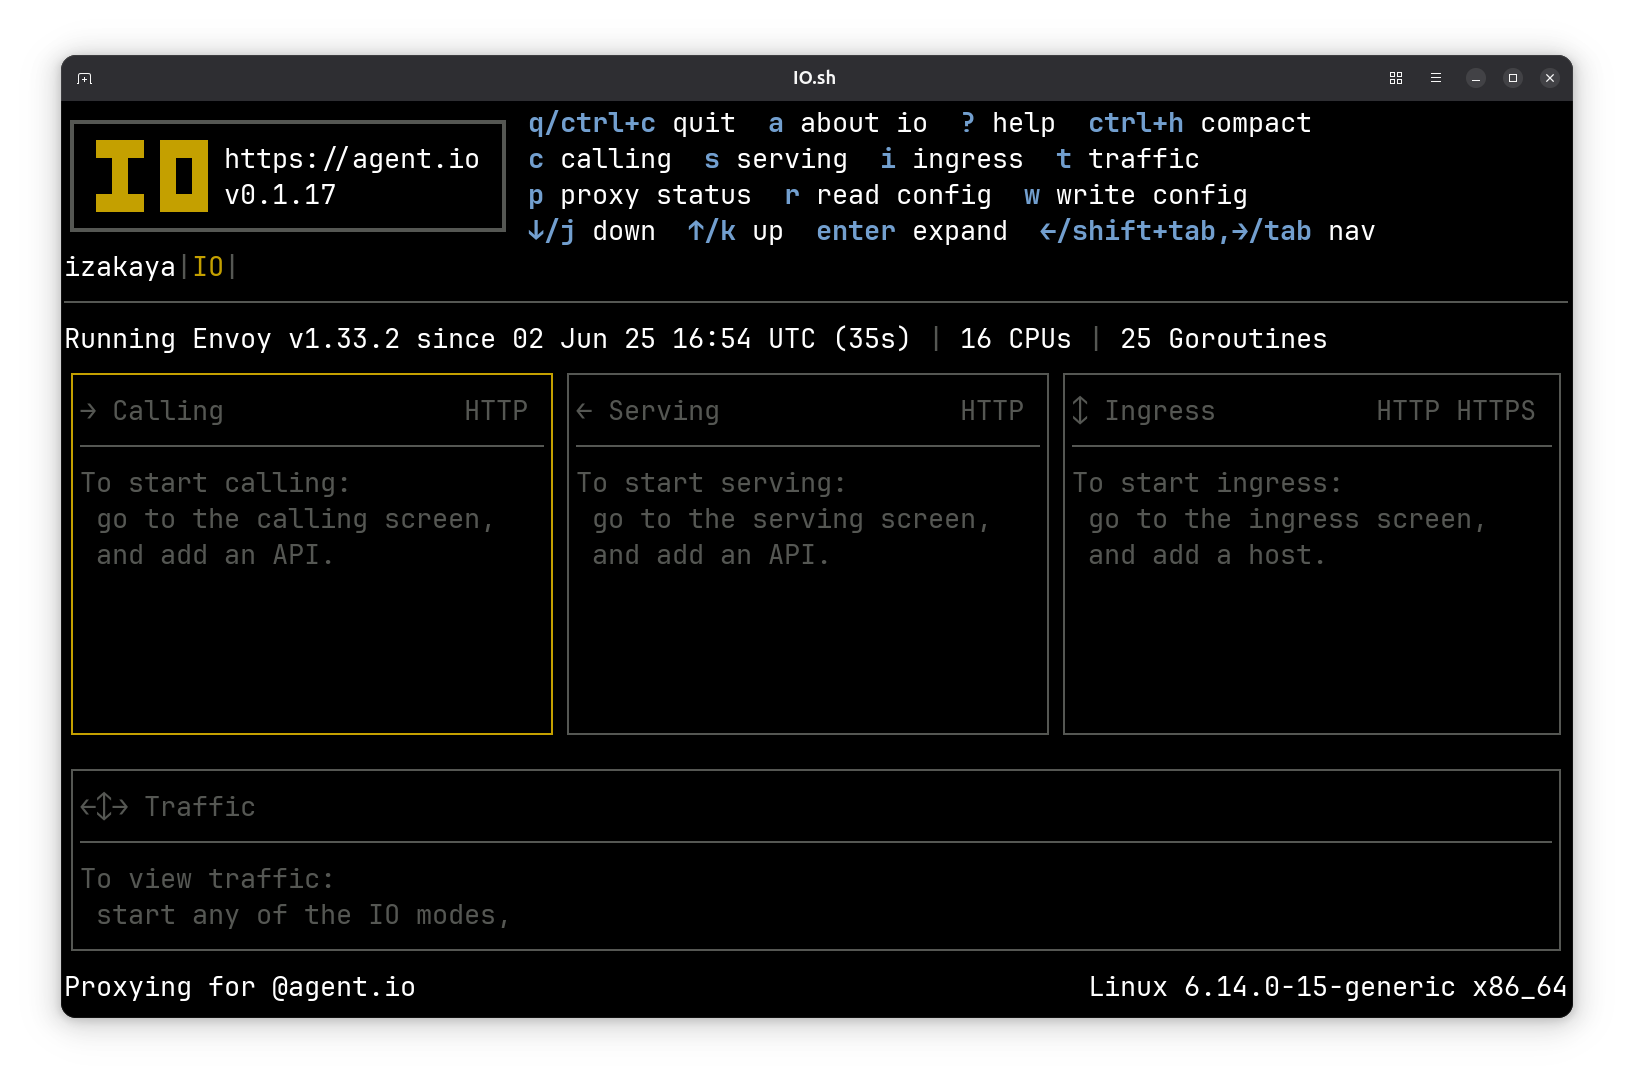
IO has a terminal user interface (TUI) that uses the full console screen. It is developed and tested with Ghostty but is expected to work in any terminal that supports ANSI escape codes and color display.
Keyboard Commands#
IO’s TUI is controlled with keyboard commands. A summary of available keyboard commands is shown at the top of each screen. Press ? for help on any screen, and many screens also use a to display extended (“about”) information.
On the main screen, you can use the left and right arrow keys to navigate through four panes:
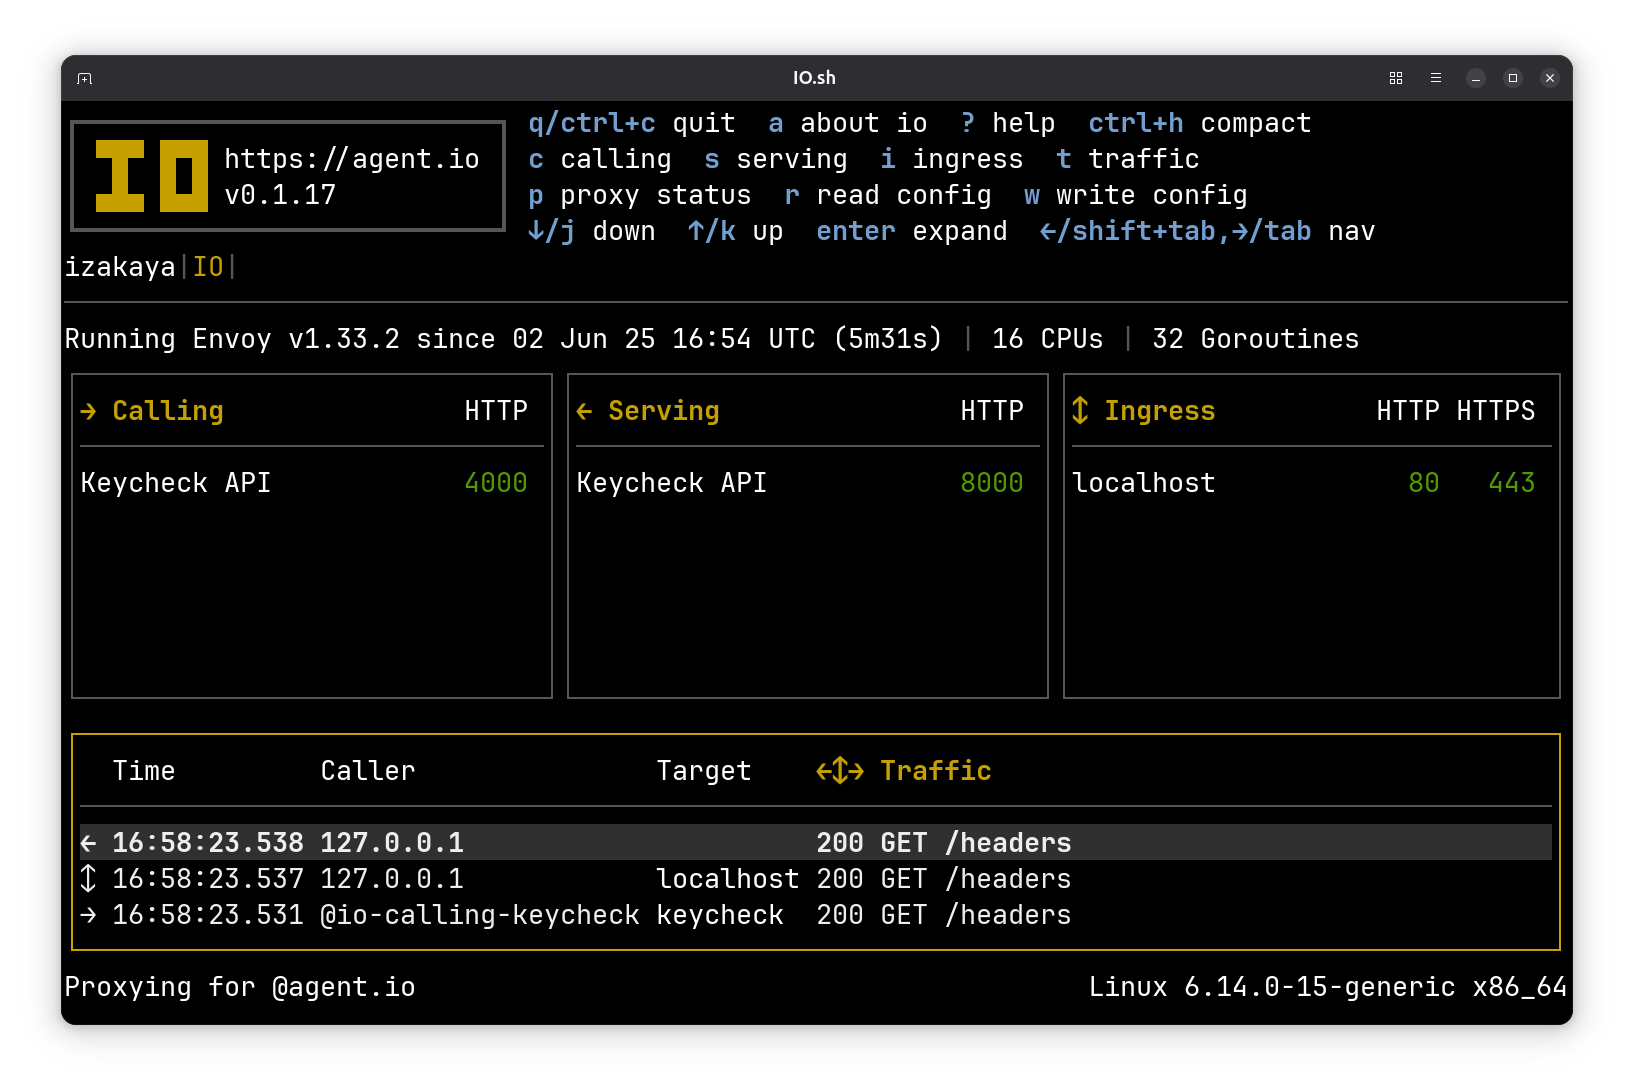
- On the center left, the calling pane lists the APIs that IO is configured to call.
- In the center of the screen, the serving pane lists the APIs and backends that IO is configured to serve.
- On the center right, the ingress pane lists the hosts (domain names) that IO is configured to serve.
- At the bottom of the screen, the traffic pane lists recent traffic. Pro tip: you can use ctrl-up/down to adjust the size of this pane.
From anywhere in the TUI, you can use ESC to climb back up the navigation hierarchy to the main screen.
Let’s Do Something!#
Hopping around IO using keyboard commands is fun (it never gets old), so feel free to explore before continuing.
When you’re ready, we’ll put IO to work with a small demonstration.
Serve an API with Serving Mode#
We’ll start by configuring IO to serve an API that we happen to have built into IO. We’ll do that by creating a serving interface with the following config:
serving "keycheck" {
  name    = "Keycheck API"
  port    = 8000
  backend = "internal:echo"
  require_apikey {
    users = <<END
hulk:{SHA}Mf6CeupM9fas594sId4LX2t4OFg=
END
  }
}
This configures IO to serve an API that we’ll calling “keycheck” internally and “Keycheck API” on internal screens. Our Envoy will be serving this API on port 8000 and the backend will be small echo service that is bundled into IO for testing.
You’ll also see a section of configuration titled require_apikey: this configures IO to require API keys for all connections to this API, and for demo purposes, we put all of the API keys in a multiline string in the Apache htpasswd format.
We generated the password data with the htpasswd tool:
% htpasswd -b -s -c pw hulk smash
Now when we call our API, it requires an API key:
$ curl http://localhost:8000/headers -i
HTTP/1.1 401 Unauthorized
date: Mon, 04 Aug 2025 23:12:36 GMT
server: envoy
content-length: 0
When we apply the key, we can see that IO sets a header with the authenticated user’s name. (We’re calling the /headers method of HTTPBin, which returns a list of the headers sent by the caller.)
$ curl http://localhost:8000/headers -i -H "api-key: smash"
HTTP/1.1 200 OK
access-control-allow-credentials: true
access-control-allow-origin: *
content-type: application/json; charset=utf-8
date: Mon, 04 Aug 2025 23:13:50 GMT
x-envoy-upstream-service-time: 0
proxy-version: v0.1.30
server: envoy
transfer-encoding: chunked

{
  "headers": {
    "Accept": [
      "*/*"
    ],
    "Api-Key": [
      "smash"
    ],
    "Host": [
      "localhost:8000"
    ],
    "Proxy-Api": [
      "keycheck"
    ],
    "Proxy-Mode": [
      "serving"
    ],
    "User-Agent": [
      "curl/8.12.1"
    ],
    "User-Name": [
      "hulk"
    ],
    "X-Envoy-Expected-Rq-Timeout-Ms": [
      "15000"
    ],
    "X-Forwarded-Proto": [
      "http"
    ],
    "X-Request-Id": [
      "1d68310d-2e5b-4312-a0d2-62e906a04449"
    ]
  }
}
Publish the API using Ingress Mode#
Now let’s publish our API using an ingress. Normally we would use a domain name that points the machine where we’re running IO, but here we instead use localhost for the host URL. The name is for human consumption only, and the backend is set to a symbolic reference to the API that we are serving (we could have also used localhost:8000 here).
ingress "localhost" {
  name    = "Keycheck API"
  backend = "serving:keycheck"
}
Now when we look in IO we see that the 443 by our ingress host is red. That’s because we need an SSL certificate. If this were a hostname that pointed to this machine’s public address, we could use LetsEncrypt to get our certificate, but instead here we’ll just generate a self-signed one. To do that, find the ingress details screen for the Keycheck API and press g (to generate a self-signed cert). When that completes, the 443 turns green and we can call our API using curl.
$ curl https://localhost/headers -i -H "api-key: smash"
curl: (60) SSL certificate problem: unable to get local issuer certificate
More details here: https://curl.se/docs/sslcerts.html

curl failed to verify the legitimacy of the server and therefore could not
establish a secure connection to it. To learn more about this situation and
how to fix it, please visit the webpage mentioned above.a
We could have avoided this problem if we’d used “http” instead of “https”, but it’s worth noting that -k tells curl to skip host certificate validation. When we add that to our curl command, it works:
$ curl https://localhost/headers -i -H "api-key: smash" -k
HTTP/2 200
access-control-allow-credentials: true
access-control-allow-origin: *
content-type: application/json; charset=utf-8
date: Mon, 04 Aug 2025 23:16:52 GMT
x-envoy-upstream-service-time: 1
server: envoy
proxy-version: v0.1.30
proxy-host: localhost

{
  "headers": {
    "Accept": [
      "*/*"
    ],
    "Api-Key": [
      "smash"
    ],
    "Host": [
      "localhost"
    ],
    "Proxy-Api": [
      "keycheck"
    ],
    "Proxy-Mode": [
      "serving"
    ],
    "User-Agent": [
      "curl/8.12.1"
    ],
    "User-Name": [
      "hulk"
    ],
    "X-Envoy-Expected-Rq-Timeout-Ms": [
      "15000"
    ],
    "X-Forwarded-Proto": [
      "https"
    ],
    "X-Request-Id": [
      "885fa9bd-5497-485b-9cb9-af8876966e99"
    ]
  }
}
Call the API using Calling Mode#
We’ve had to send our API key with all of our requests so far. To avoid having to do that, let’s create a calling mode interface to our API with the configuration below.
calling "keycheck" {
  name     = "Keycheck API"
  port     = 4000
  target   = "localhost"
  insecure = true
  apply_header "api-key" {
    credential = "keycheck"
  }
}

secret "keycheck" {
  value = "smash"
}
Here we’ve created a secret named keycheck with value smash. This puts the secret in an internal IO table. If our IO is configured to work with Vault, we could instead put the secret in Vault and refer to it with something like vault:keycheck (assuming our secret is named keycheck in Vault).
Now we can call the API through the calling interface and IO will take care of authentication.
$ curl http://localhost:4000/headers -i
HTTP/1.1 200 OK
access-control-allow-credentials: true
access-control-allow-origin: *
content-type: application/json; charset=utf-8
date: Mon, 04 Aug 2025 23:18:27 GMT
x-envoy-upstream-service-time: 9
server: envoy
proxy-host: localhost
proxy-version: v0.1.30
transfer-encoding: chunked

{
  "headers": {
    "Accept": [
      "*/*"
    ],
    "Api-Key": [
      "smash"
    ],
    "Host": [
      "localhost"
    ],
    "Proxy-Api": [
      "keycheck"
    ],
    "Proxy-Mode": [
      "serving"
    ],
    "User-Agent": [
      "curl/8.12.1"
    ],
    "User-Name": [
      "hulk"
    ],
    "X-Envoy-Expected-Rq-Timeout-Ms": [
      "15000"
    ],
    "X-Forwarded-Proto": [
      "http"
    ],
    "X-Request-Id": [
      "3b46227d-8cba-4c6d-9eb1-65364280f285"
    ]
  }
}
What about that self-signed certificate? Our call would have failed if we hadn’t specified insecure = true in our calling configuration. That told IO to configure Envoy to turn off certificate validation for this calling interface.
Explore!#
Now if you take a few minutes to explore the IO TUI, you can see details about the calling, serving, and ingress interfaces that we just configured and you can browse the traffic that IO recorded for the calls that we made.
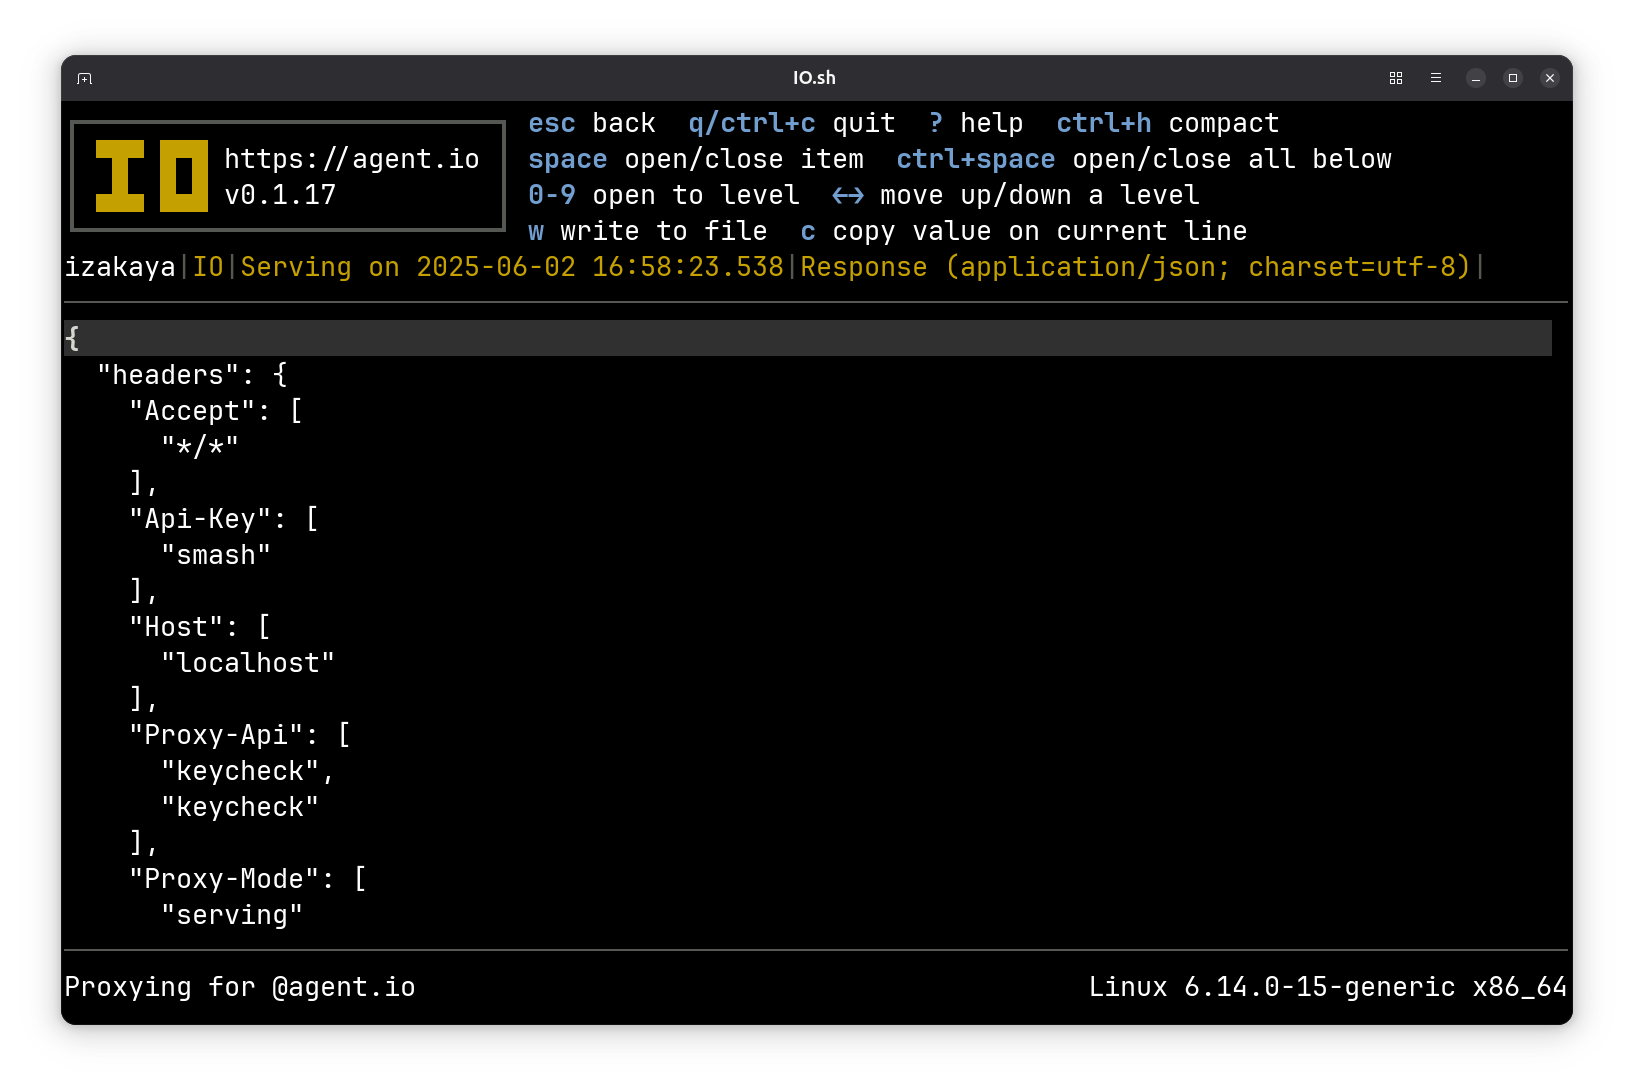
See if you can find this screen that shows message response bodies:
The Proxy Details Screen#
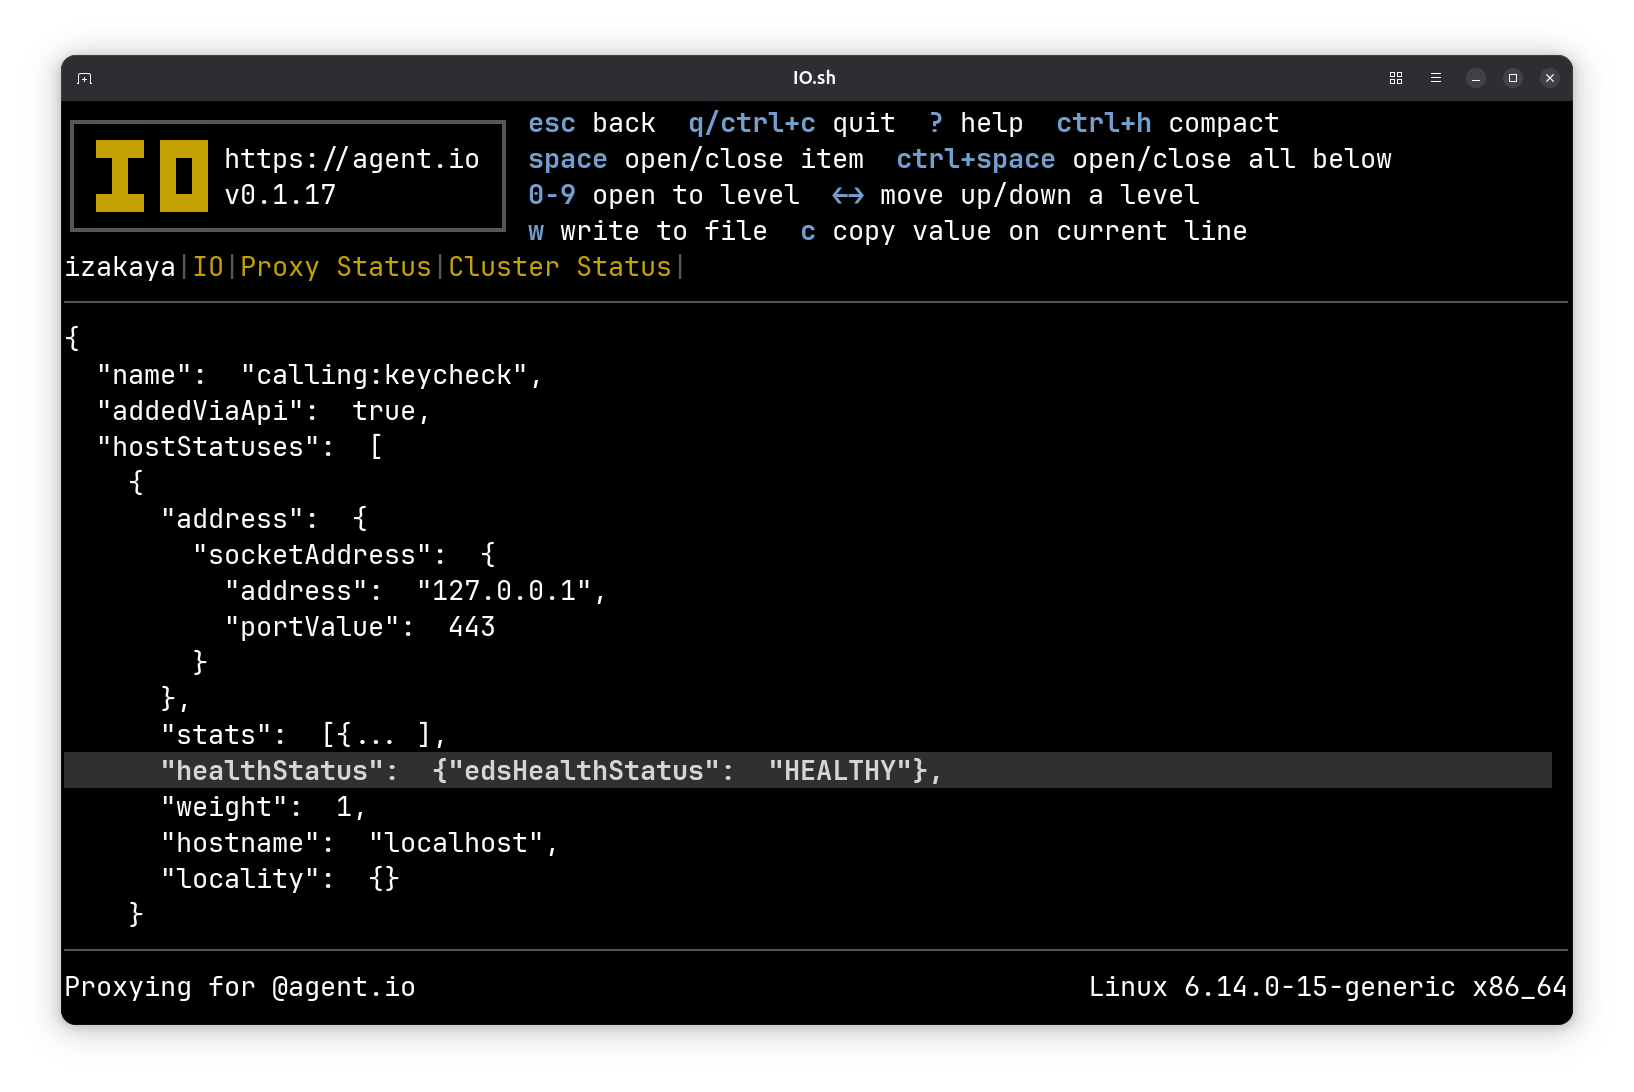
One screen that is worth discussing is the Proxy Details screen, where you can explore the current Envoy configuration. Here you can see lists of the listeners and clusters that IO has configured in Envoy.
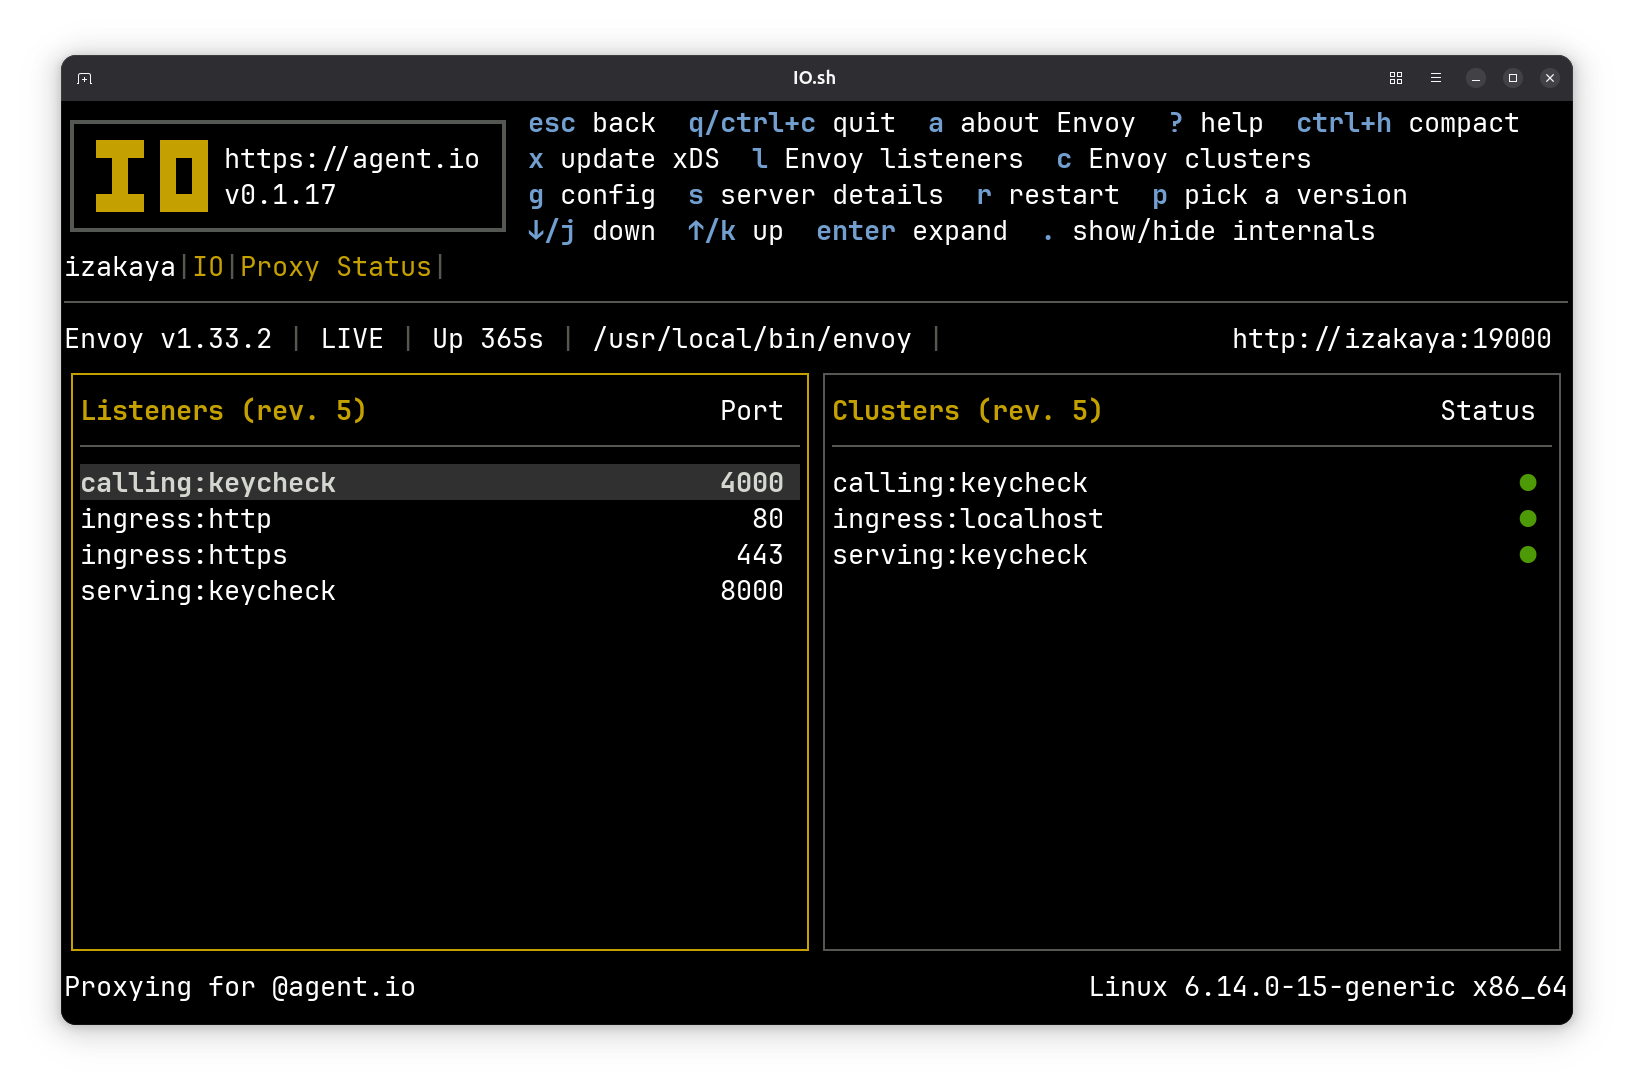
The four listeners here should be easily understood: these are listening on the ports we’ve been using in our demo. The clusters are the endpoints that Envoy calls, and here they are named for their purpose (instead of their destination). For example the calling:keycheck cluster points to localhost:443.
These are the listeners and clusters that you would expect to see from IO’s configuration. There are more behind the scenes. Press . to include the IO’s internal listeners and clusters. Then you’ll see the clusters that Envoy uses to call Envoy for control (Envoy’s CDS, LDS, and ext_proc APIs) and special features (ACME and authorization for ingresses). There’s also an extra cluster and listener named .calling:keycheck. These exist because Calling Mode connections actually make two passes through Envoy: the first is configured for retry and the second uses ext_proc to apply credentials. These are separated because Envoy’s retry happens after ext_proc sets headers and we want to be able to refresh our credentials sometimes before retrying.
You won’t see any ports for these internal listeners and clusters. That’s because they all use Linux abstract sockets, which I think is one of many excellent reasons to build and run your software on Linux.
