
What is Vault?#
Vault is a HashiCorp product that provides secrets management, identity-based access, application data encryption, and auditing. Here we’ll focus on its use to manage secrets. Vault provides secure, encrypted storage of secrets that protects and provides controlled sharing.
Why use a secrets manager?#
One of the largest contributors to data breaches is leaked credentials, and according to at least one study, billions of credentials have been leaked!
A common way that credentials are leaked is in source code. Getting credentials out of your source code protects them from being accidentally checked into code repositories and other archives. Secrets managers can help with this. When applications need secrets they can get them from a secrets manager, either by making direct requests or by relying on something in their environment to get secrets and make them available as environment variables.
That is how secrets managers are commonly used, but why stop there? Giving secrets to applications at runtime allows hostile or buggy applications to intentionally or accidentally log or misuse those secrets once they get them. With IO, we can do better, but let’s first get set up with Vault.
Getting Started with Vault#
Here is a simple way to set up Vault on Ubuntu.
Installing Vault#
This script installs Vault on an Ubuntu system.
#!/bin/sh

# Install basic utilities.
sudo apt-get update && sudo apt-get install wget gpg coreutils

# Get the latest Hashicorp gpg keyring.
sudo rm -f /usr/share/keyrings/hashicorp-archive-keyring.gpg
wget -O- https://apt.releases.hashicorp.com/gpg | \
  sudo gpg --dearmor -o /usr/share/keyrings/hashicorp-archive-keyring.gpg

# Add the hashicorp source list.
echo "deb [signed-by=/usr/share/keyrings/hashicorp-archive-keyring.gpg] https://apt.releases.hashicorp.com $(lsb_release -cs) main" | \
  sudo tee /etc/apt/sources.list.d/hashicorp.list

# Install Nomad and Vault.
sudo apt-get update && sudo apt-get install vault
Configuring Vault#
Vault configuration is in /etc/vault.d/vault.hcl. Here’s a simple single-node configuration:
ui = true

storage "file" {
  path = "/opt/vault/data"
}

listener "tcp" {
  address = "127.0.0.1:8200"
  tls_disable = 1
}
Initializing Vault#
Vault runs as the vault user, so you will need to create /opt/vault and chown it to belong to vault.
You can start Vault with sudo systemctl start vault. When it is running, you can connect to the Vault UI at localhost:8200. If this is the first time you’ve run this Vault instance, your first task will be to initialize it. Here’s what the UI initially presents:
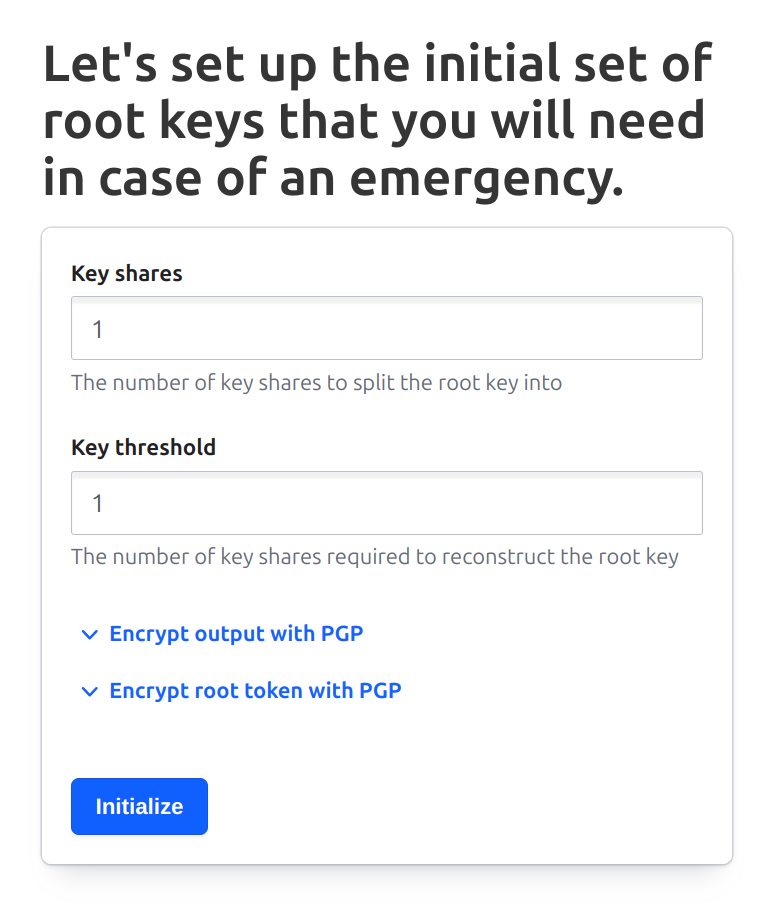
I’ve selected “1” for both the number of key shares and the key threshold. In more serious installations, you would want to use higher numbers, but this allows us to easily manage a local test instance. Once the Initialize button is pressed, you should see the following screen:
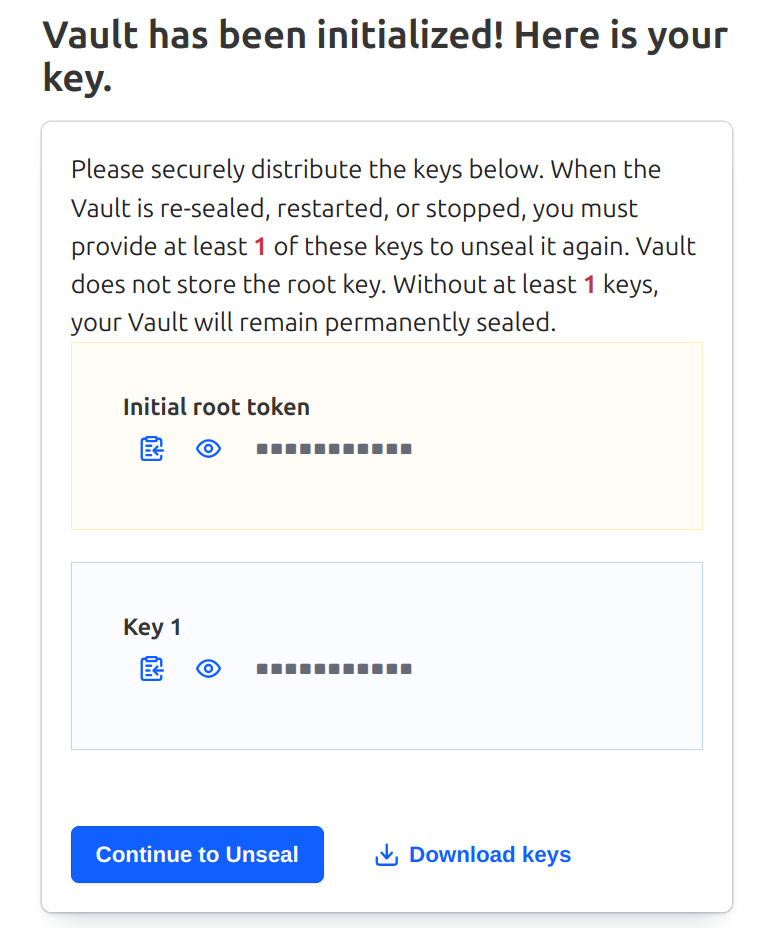
Rather than copy the tokens from this page, I usually use the Download button to download a JSON file to my local Downloads directory.
Unsealing Vault#
To more easily manage my test vaults, I’ve written a small CLI called v. It expects these downloaded credentials to be in ~/.config/vault/keys.json. I can move the file that I just downloaded there with this:
$ mv ~/Downloads/vault-cluster-vault-2025-07-26T18_32_14.304Z.json ~/.config/vault/keys.json
$ more ~/.config/vault/keys.json
{
  "keys": [
    "<A 64-CHARACTER HEX STRING>"
  ],
  "keys_base64": [
    "<THE BASE64 ENCODING OF THE KEY>"
  ],
  "root_token": "<ANOTHER BASE64-ENCODED TOKEN>"
}
Now if I’ve installed v, I can use v unseal to unseal my local Vault.
$ v unseal
{
  "build_date": "2025-07-24T13:33:51Z",
  "cluster_id": "fe9650bd-89f6-4f7c-0882-3557c88dc9d8",
  "cluster_name": "vault-cluster-8023e4d0",
  "initialized": true,
  "migration": false,
  "n": 1,
  "nonce": "",
  "progress": 0,
  "recovery_seal": false,
  "sealed": false,
  "storage_type": "file",
  "t": 1,
  "type": "shamir",
  "version": "1.20.1"
}
Going back to the UI, I find that I now see a Vault login screen.
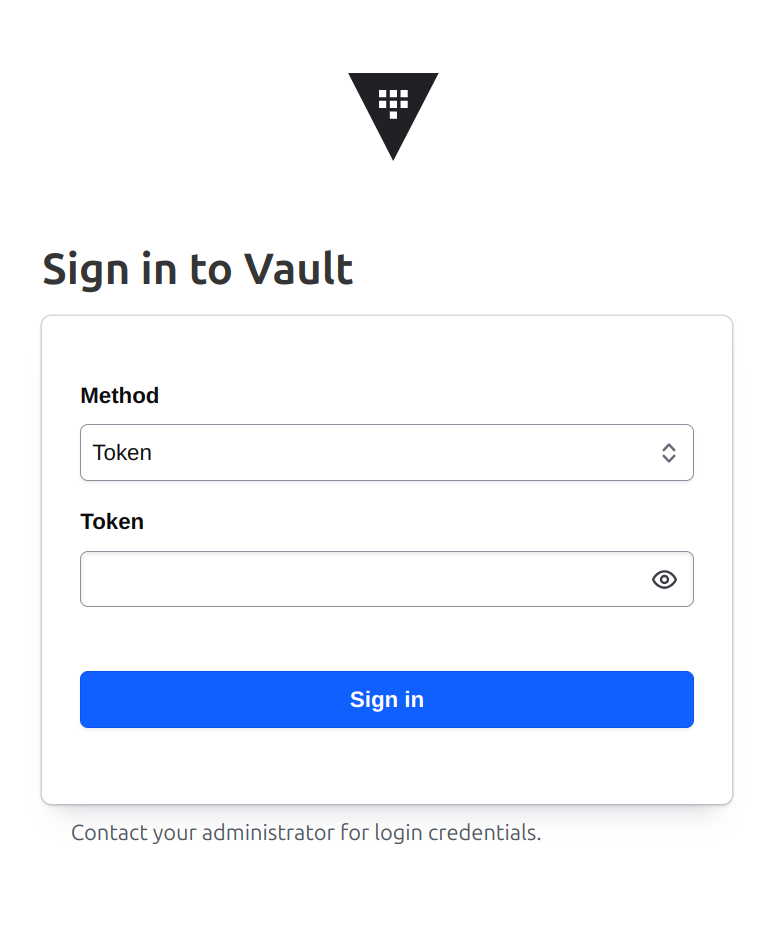
Signing into Vault#
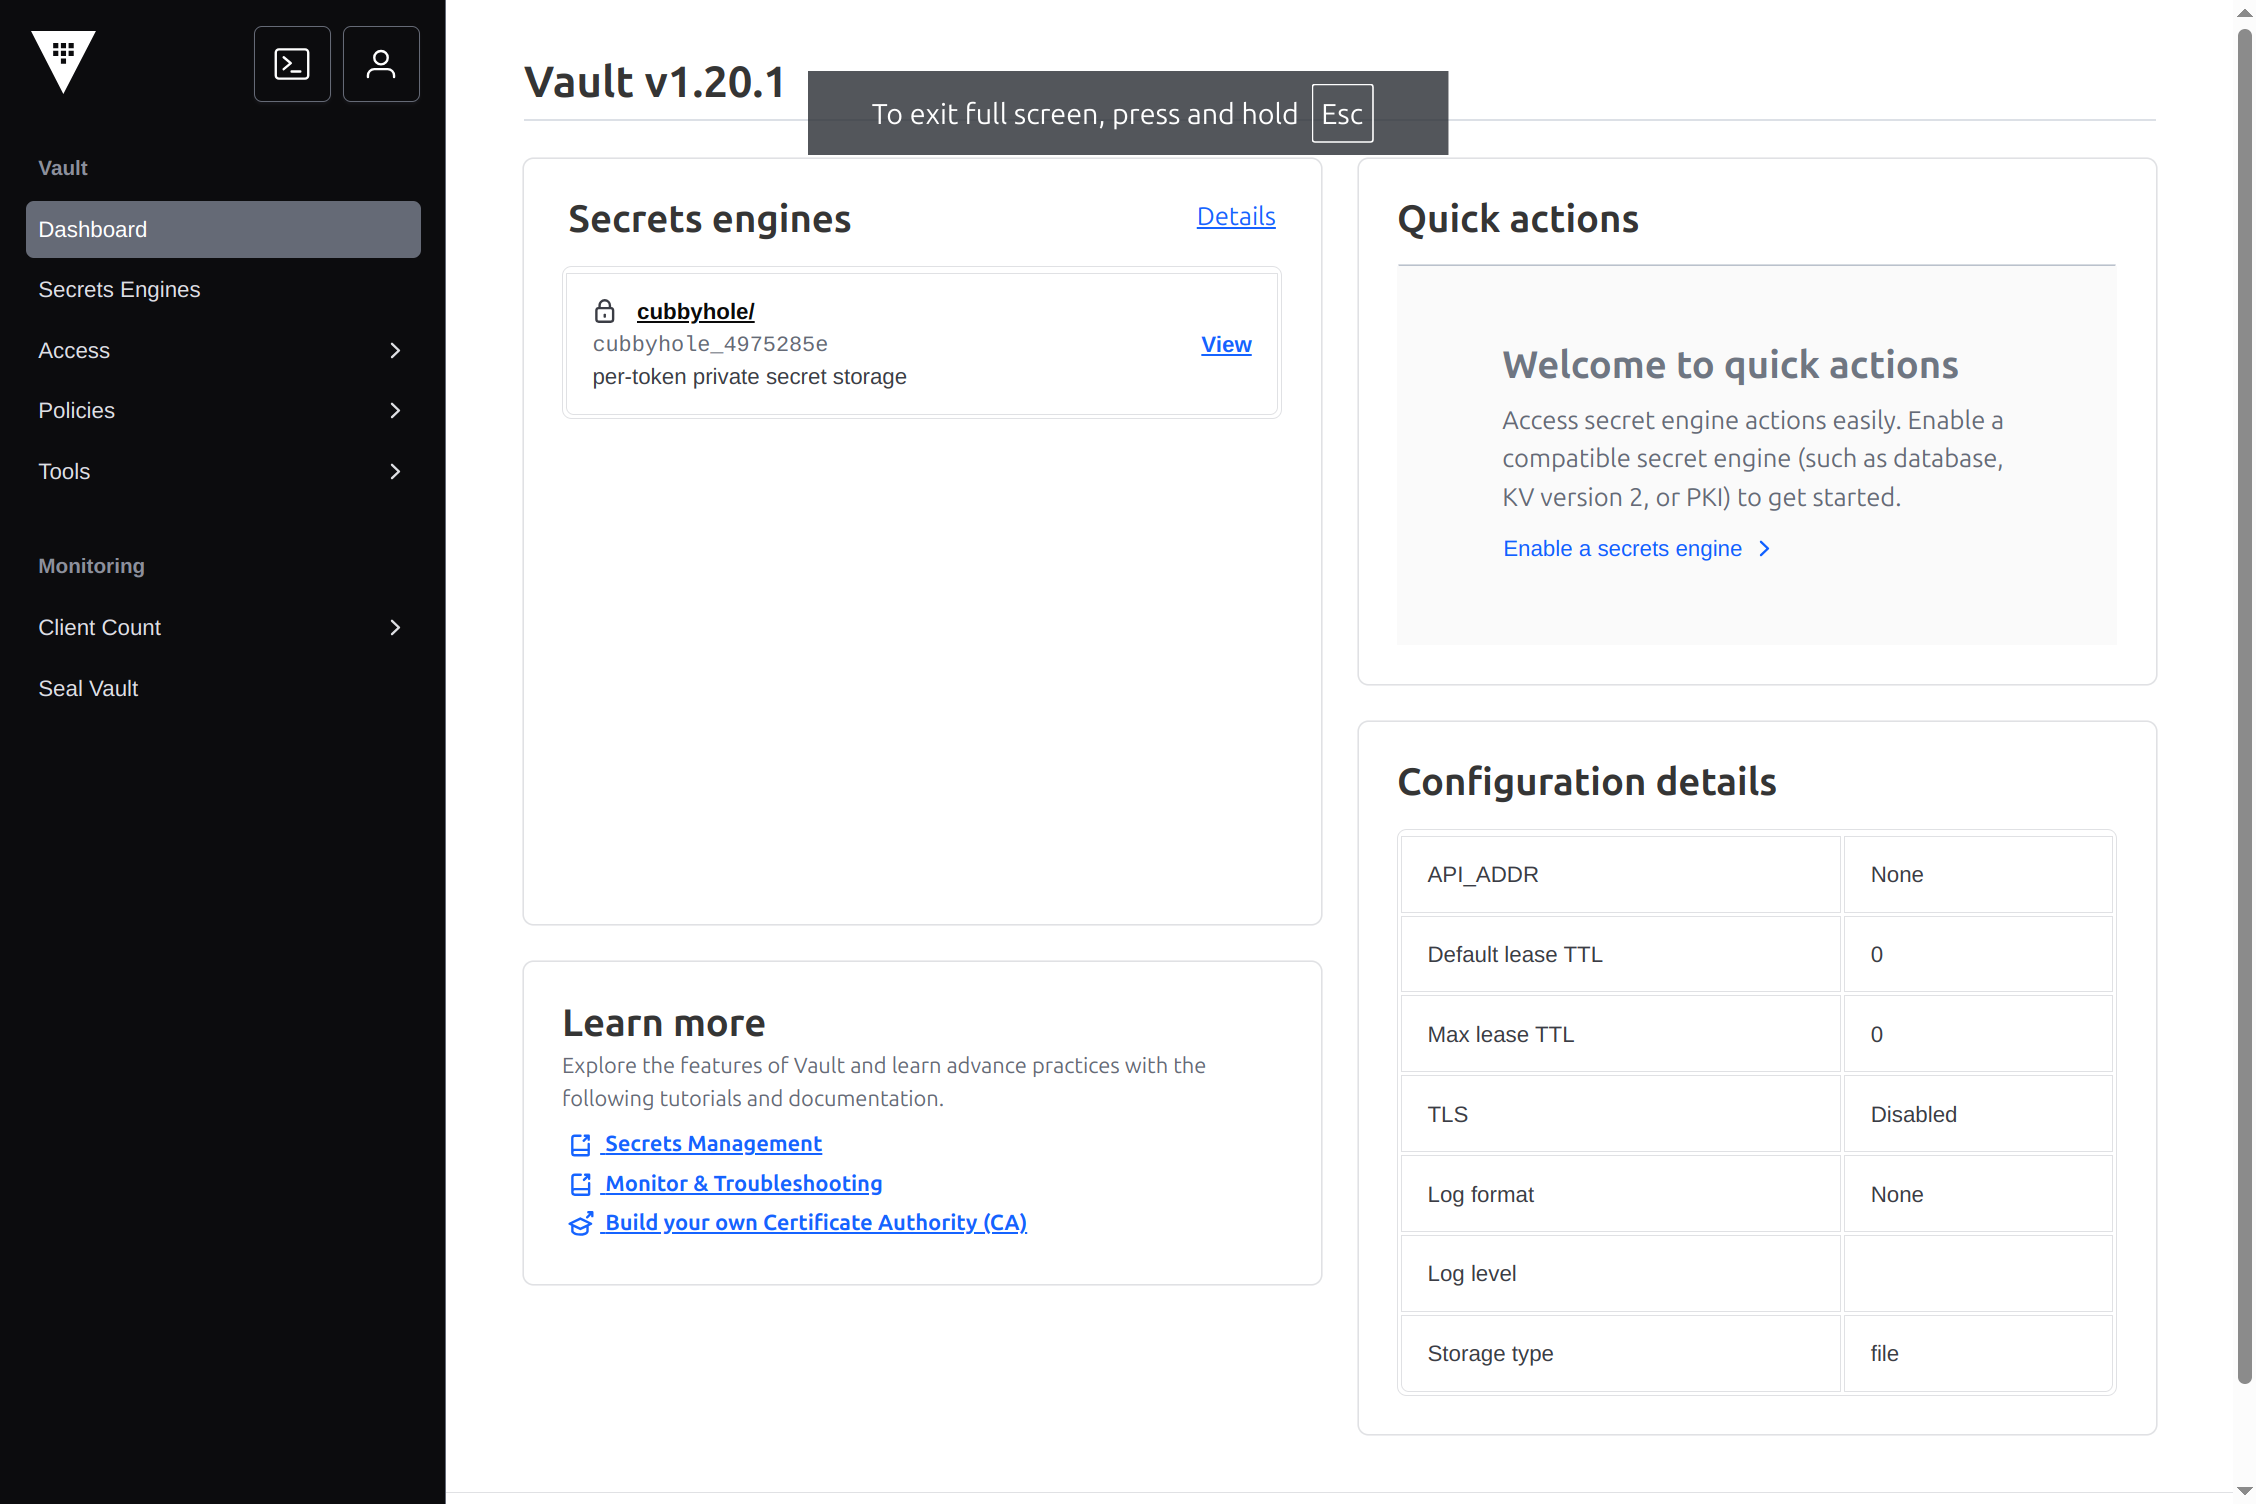
To sign into Vault, I need a token. I can read the token out of the JSON file that I just downloaded, or I can just use v token to copy that onto the pasteboard. When I use that token to sign in, I see the Vault console.
Getting Secrets with Nomad Workload Identity#
If we are running applications in Nomad, we can configure Vault to allow Nomad workloads to access secrets using their workload identities. We can use this to allow IO to read and write secrets from Vault without a password.
Getting started with nomad setup vault#
We can configure Nomad to connect with Vault using nomad setup vault. Here’s what happens when we run it and accept all of the defaults. Note that this requires VAULT_ADDR and VAULT_TOKEN to be set. As shown below, we can set those with v env.
$ $(v env)
$ nomad setup vault

This command will walk you through configuring all the components required for
Nomad workloads to authenticate themselves against Vault ACL using their
respective workload identities.

First we need to connect to Vault.

[?] Is "http://localhost:8200" the correct address of your Vault cluster? [Y/n] y

We will now enable the JWT credential backend and create a JWT auth method that
Nomad workloads will use.

This is the method configuration:

{
    "default_role": "nomad-workloads",
    "jwks_url": "http://localhost:4646/.well-known/jwks.json",
    "jwt_supported_algs": [
        "EdDSA",
        "RS256"
    ]
}
[?] Create JWT auth method in your Vault cluster? [Y/n] y
[✔] Created JWT auth method "jwt-nomad".

We need to create a role that Nomad workloads will assume while authenticating,
and a policy associated with that role.


These are the rules for the policy "nomad-workloads" that we will create. It uses a templated
policy to allow Nomad tasks to access secrets in the path
"secrets/data/<job namespace>/<job name>":

path "secret/data/{{identity.entity.aliases.auth_jwt_d89fb1e1.metadata.nomad_namespace}}/{{identity.entity.aliases.auth_jwt_d89fb1e1.metadata.nomad_job_id}}/*" {
  capabilities = ["read"]
}

path "secret/data/{{identity.entity.aliases.auth_jwt_d89fb1e1.metadata.nomad_namespace}}/{{identity.entity.aliases.auth_jwt_d89fb1e1.metadata.nomad_job_id}}" {
  capabilities = ["read"]
}

path "secret/metadata/{{identity.entity.aliases.auth_jwt_d89fb1e1.metadata.nomad_namespace}}/*" {
  capabilities = ["list"]
}

path "secret/metadata/*" {
  capabilities = ["list"]
}

[?] Create the above policy in your Vault cluster? [Y/n] y
[✔] Created policy "nomad-workloads".

We will now create an ACL role called "nomad-workloads" associated with the policy above.

{
    "bound_audiences": "vault.io",
    "claim_mappings": {
        "nomad_job_id": "nomad_job_id",
        "nomad_namespace": "nomad_namespace",
        "nomad_task": "nomad_task"
    },
    "role_type": "jwt",
    "token_period": "30m",
    "token_policies": [
        "nomad-workloads"
    ],
    "token_type": "service",
    "user_claim": "/nomad_job_id",
    "user_claim_json_pointer": true
}
[?] Create role in your Vault cluster? [Y/n] y
[✔] Created role "nomad-workloads".

Congratulations, your Vault cluster is now setup and ready to accept Nomad
workloads with Workload Identity!

You need to adjust your Nomad client configuration in the following way:

vault {
  enabled = true
  address = "<Vault address>"

  # Vault Enterprise only.
  # namespace = "<namespace>"

  jwt_auth_backend_path = "jwt-nomad/"
}

And your Nomad server configuration in the following way:

vault {
  enabled = true

  default_identity {
    aud = ["vault.io"]
    ttl = "1h"
  }
}
Configuring Nomad Workload Identity#
Since I’m running a single Nomad agent as both client and server, I combined the two vault blocks into this one that I added to /etc/nomad.d/nomad.hcl:
vault {
  enabled = true
  address = "http://localhost:8200"
  jwt_auth_backend_path = "jwt-nomad/"

  default_identity {
    aud = ["vault.io"]
    ttl = "1h"
  }
}
Configuring Nomad Jobs#
Now (after restarting Nomad) I can configure Nomad jobs to get tokens that they can use to call the Vault API. There are two ways to do this: either by reading a local file (created by Nomad) or by reading an environment variable. Here are jobs that do both, using Nomad’s cool exec driver, which can run programs without a container.
Getting Vault Tokens from a local file#
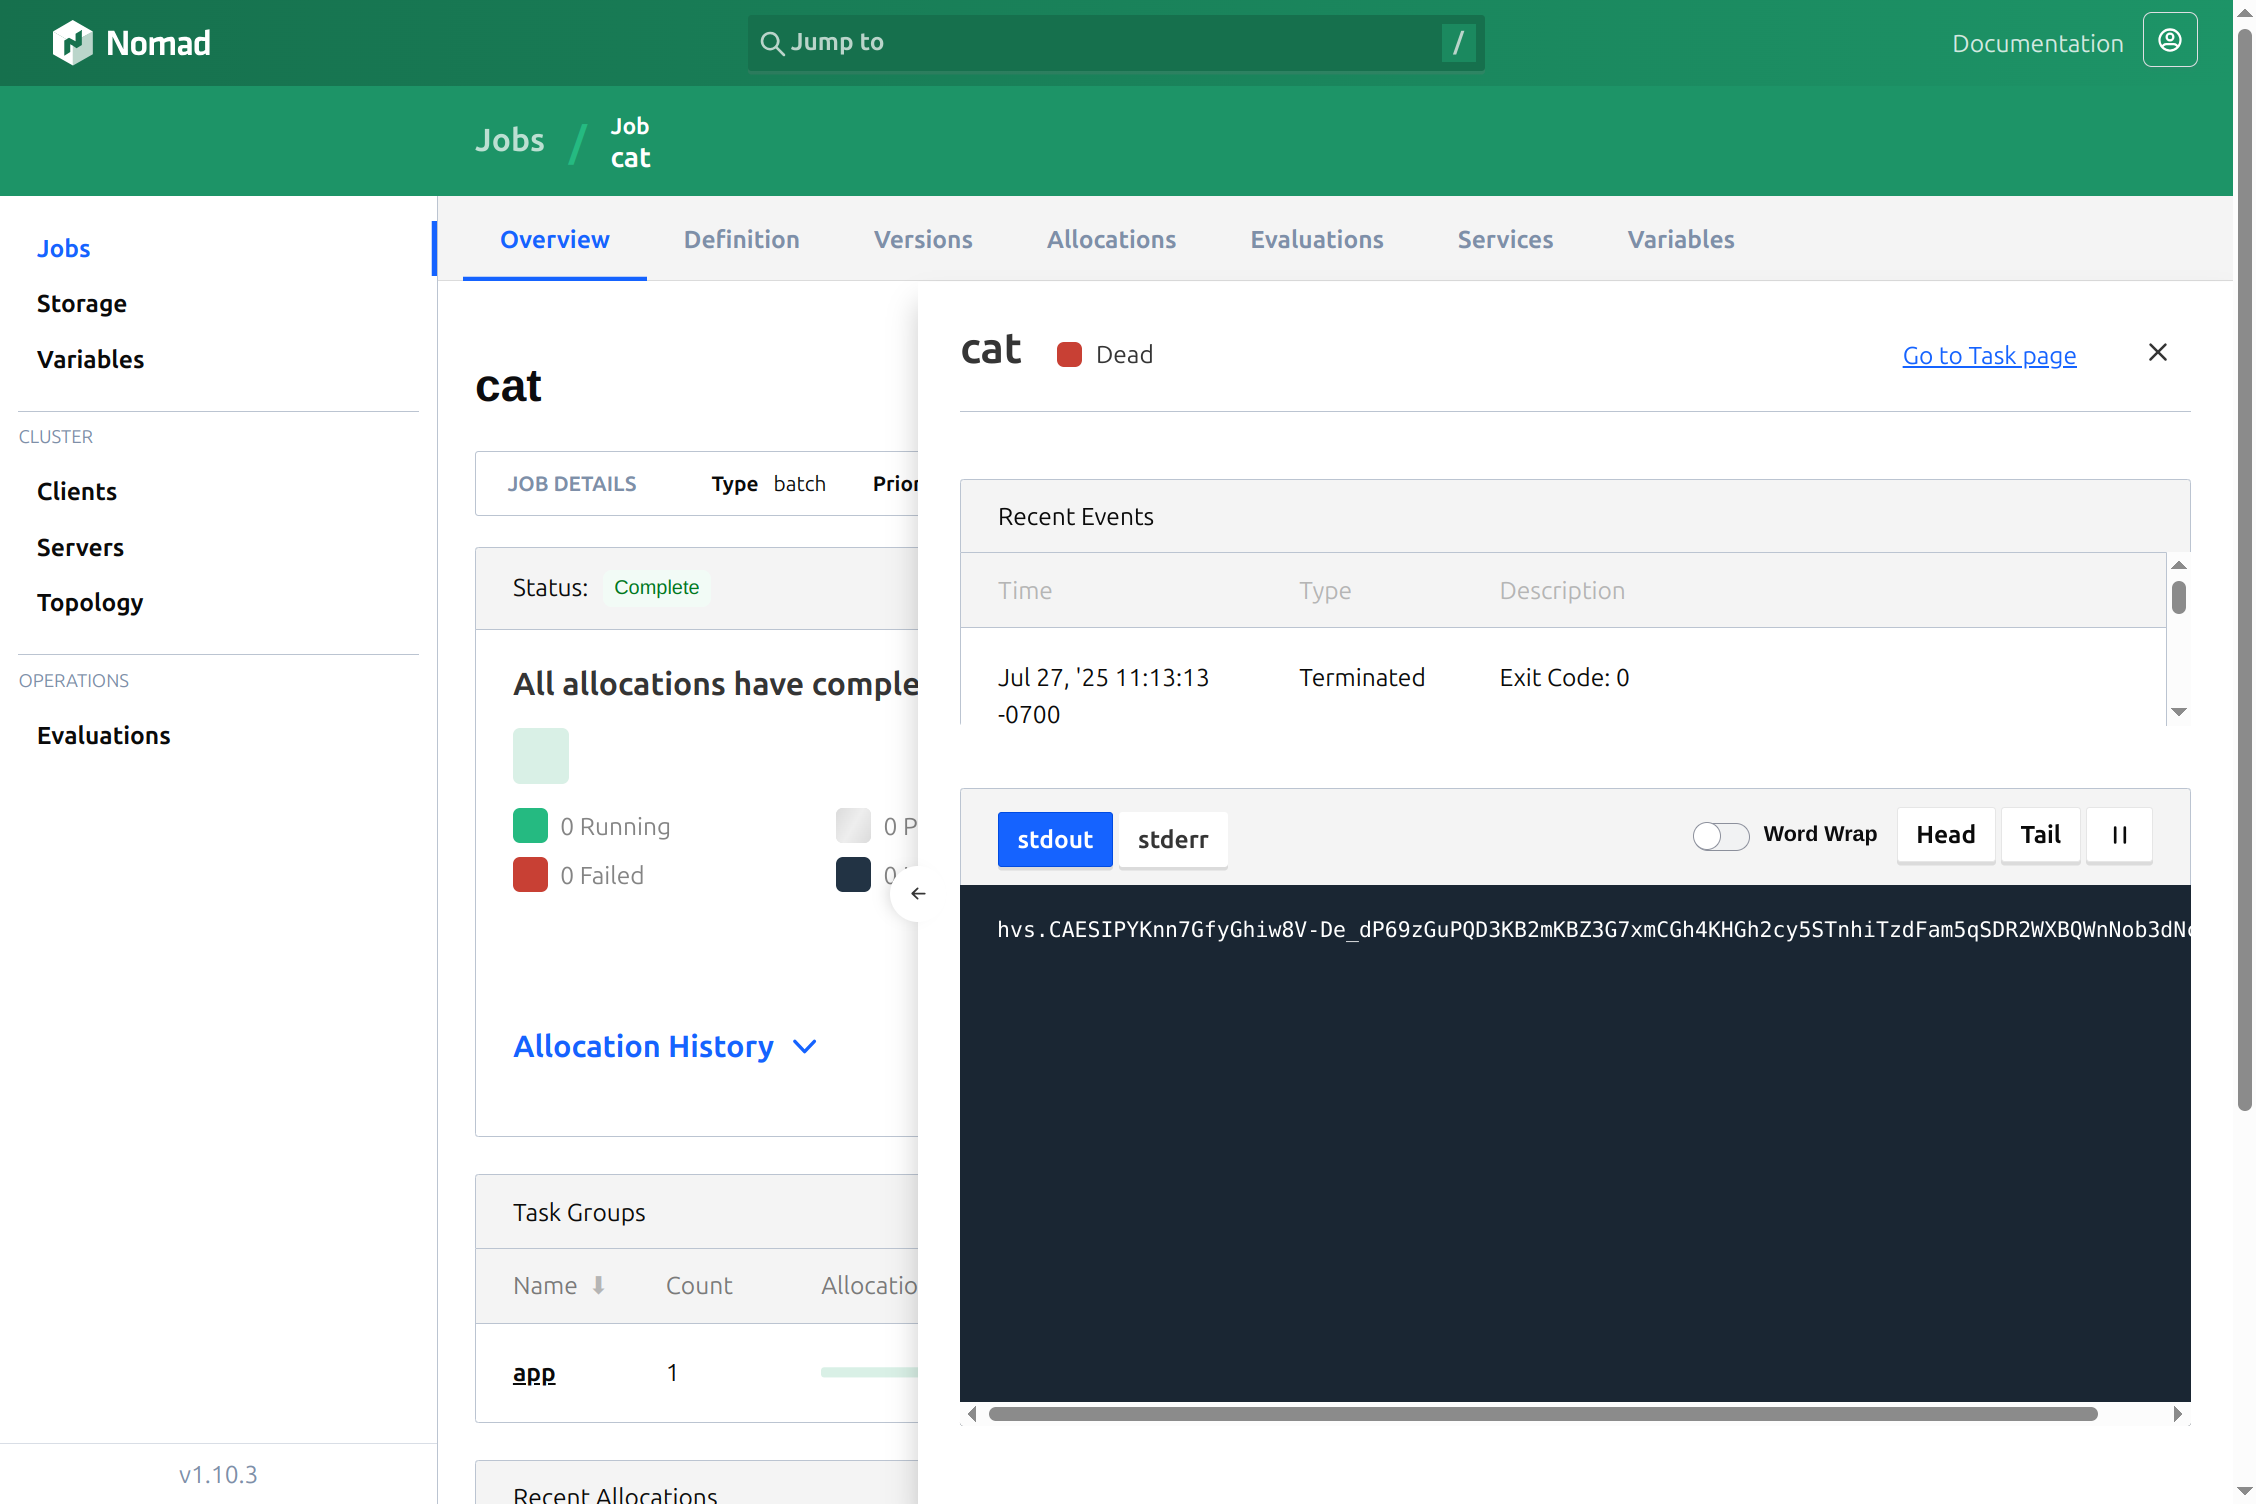
First, here’s a job that prints a local file with cat:
job "cat" {
  datacenters = ["dc1"]
  type = "batch"
  group "app" {
    task "cat" {
      driver = "exec"
      config {
        command = "/usr/bin/cat"
        args = ["secrets/vault_token"]
      }
      vault {
        role = "nomad-workloads"
      }
    }
  }
}
When I run this with nomad job run cat.hcl, I see that my Vault token is printed on standard output and can be seen in my job logs:
Getting Vault Tokens from the Environment#
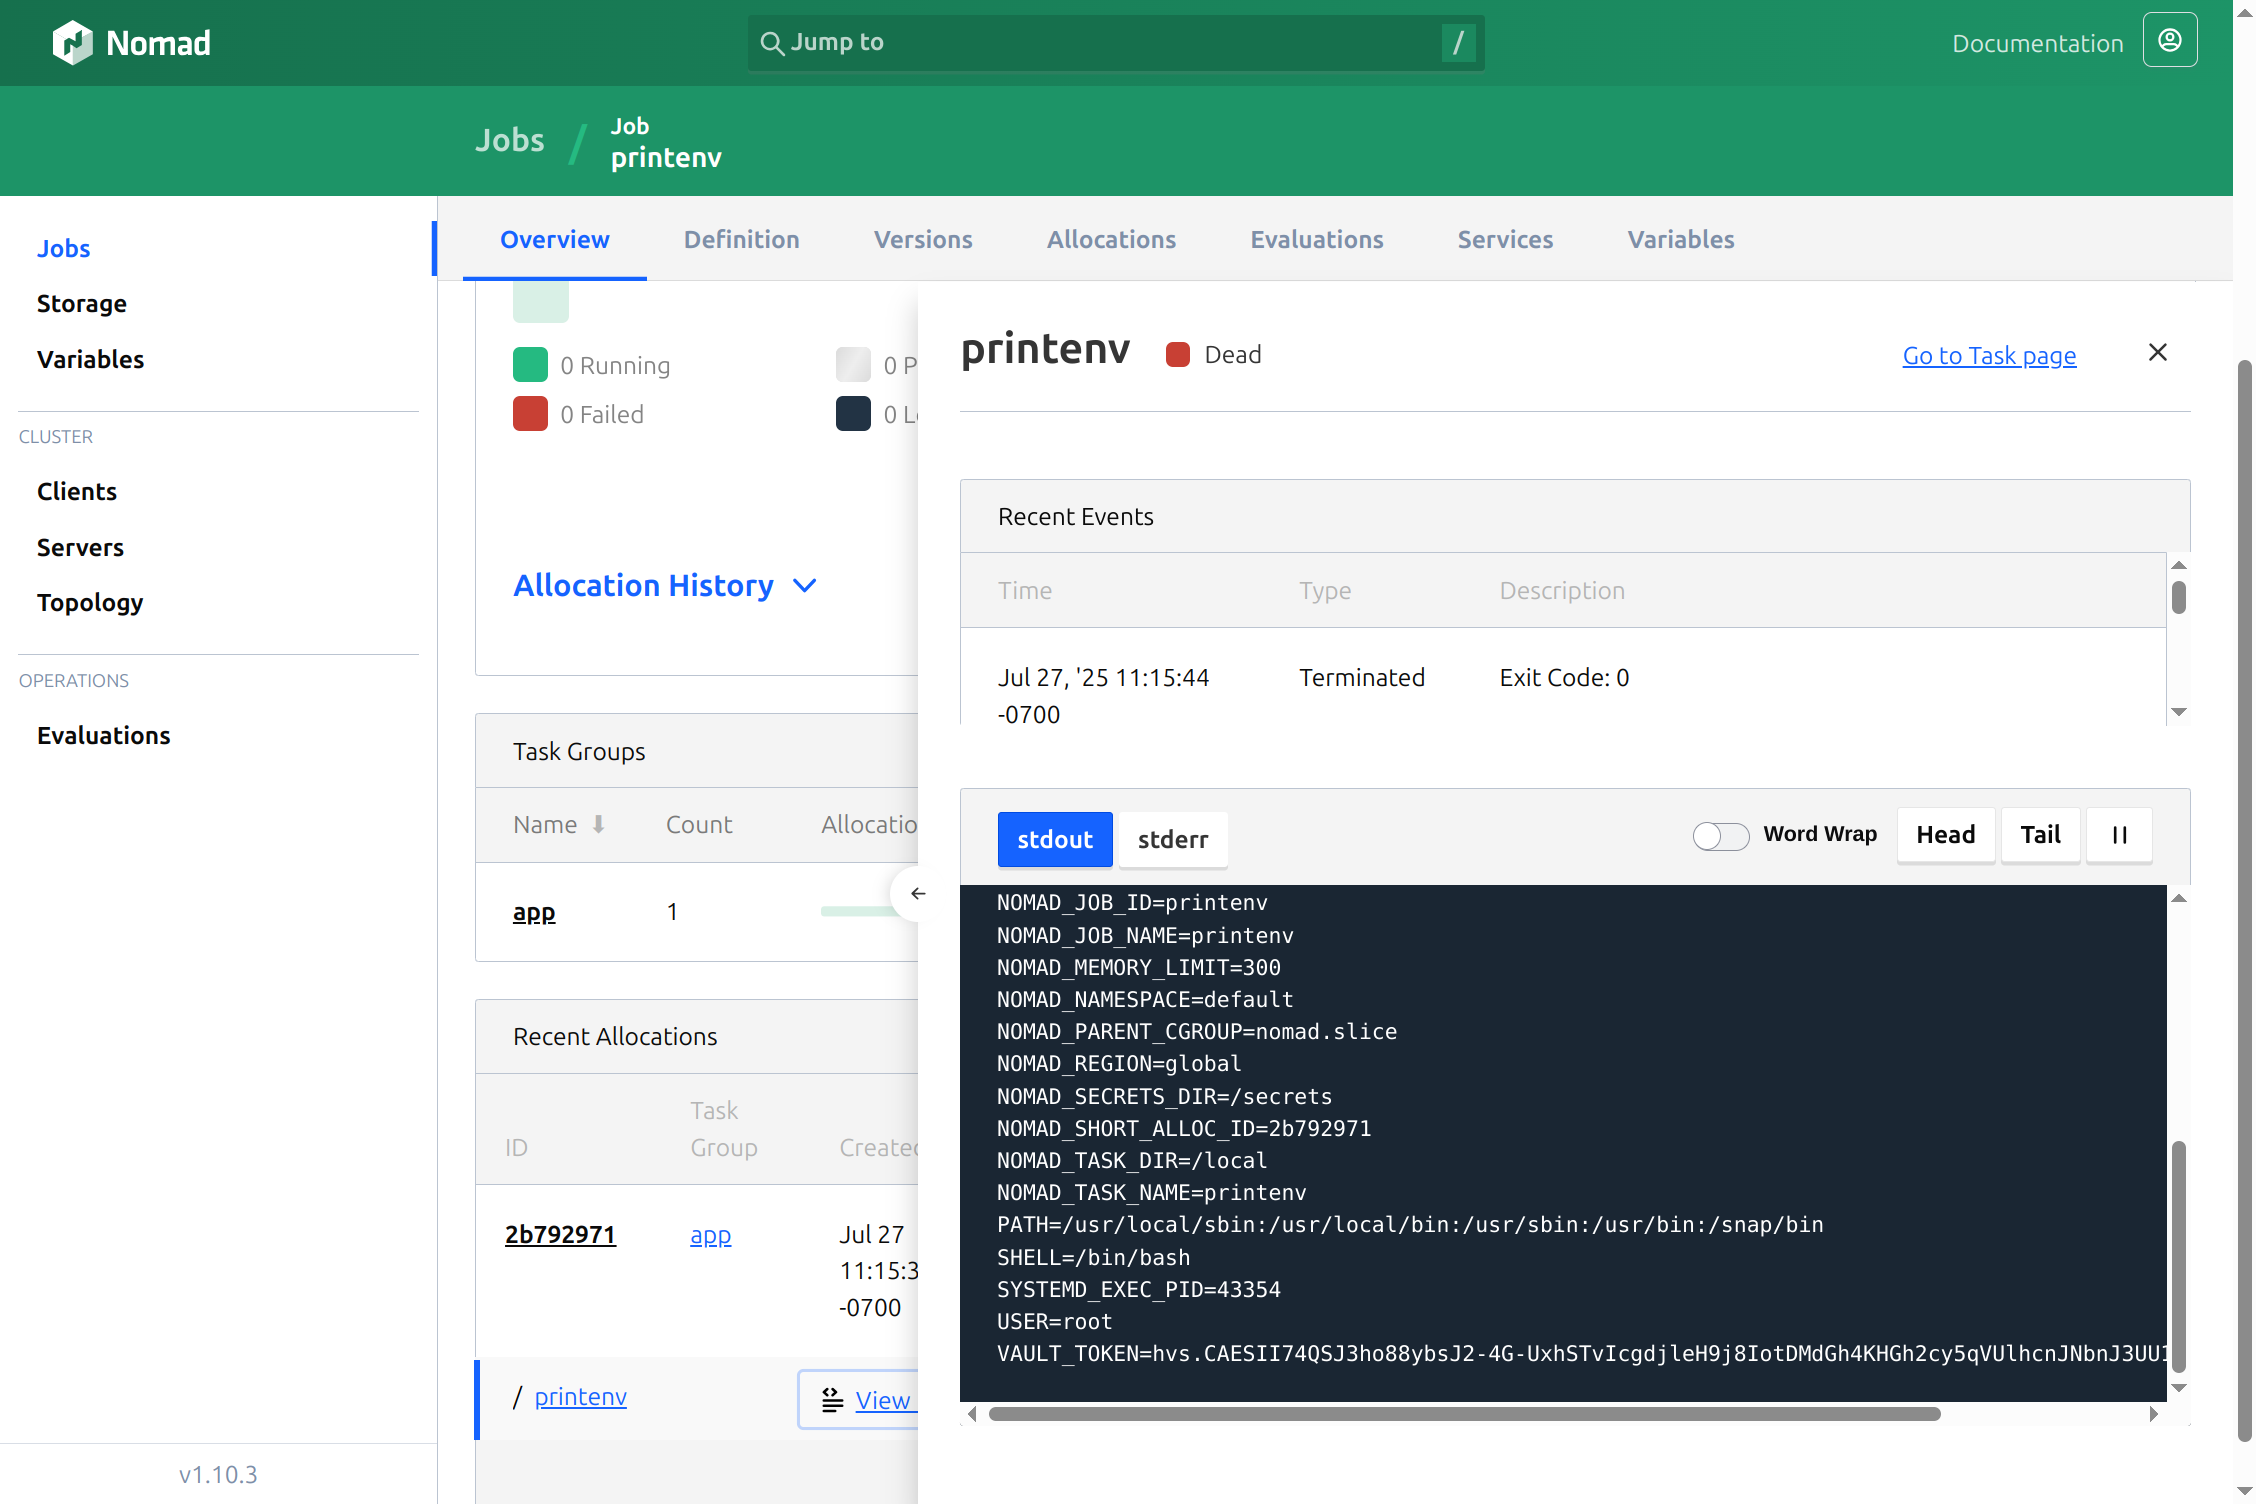
We can also get our Vault tokens with an environment variable. Here’s a Nomad job that does that:
job "printenv" {
  datacenters = ["dc1"]
  type = "batch"
  group "app" {
    task "printenv" {
      driver = "exec"
      config {
        command = "/usr/bin/printenv"
      }
      vault {
        role = "nomad-workloads"
      }
    }
  }
}
When I run this with nomad job run printenv.hcl, I see that my VAULT_TOKEN appears as an environment variable that my job prints in its logs.
Configuring IO to use Secrets from Vault#
Now we can configure an IO running in a Nomad cluster to use secrets from Vault.
First we update the task block in IO’s job configuration to add the vault declaration:
vault {
  role = "nomad-workloads"
}
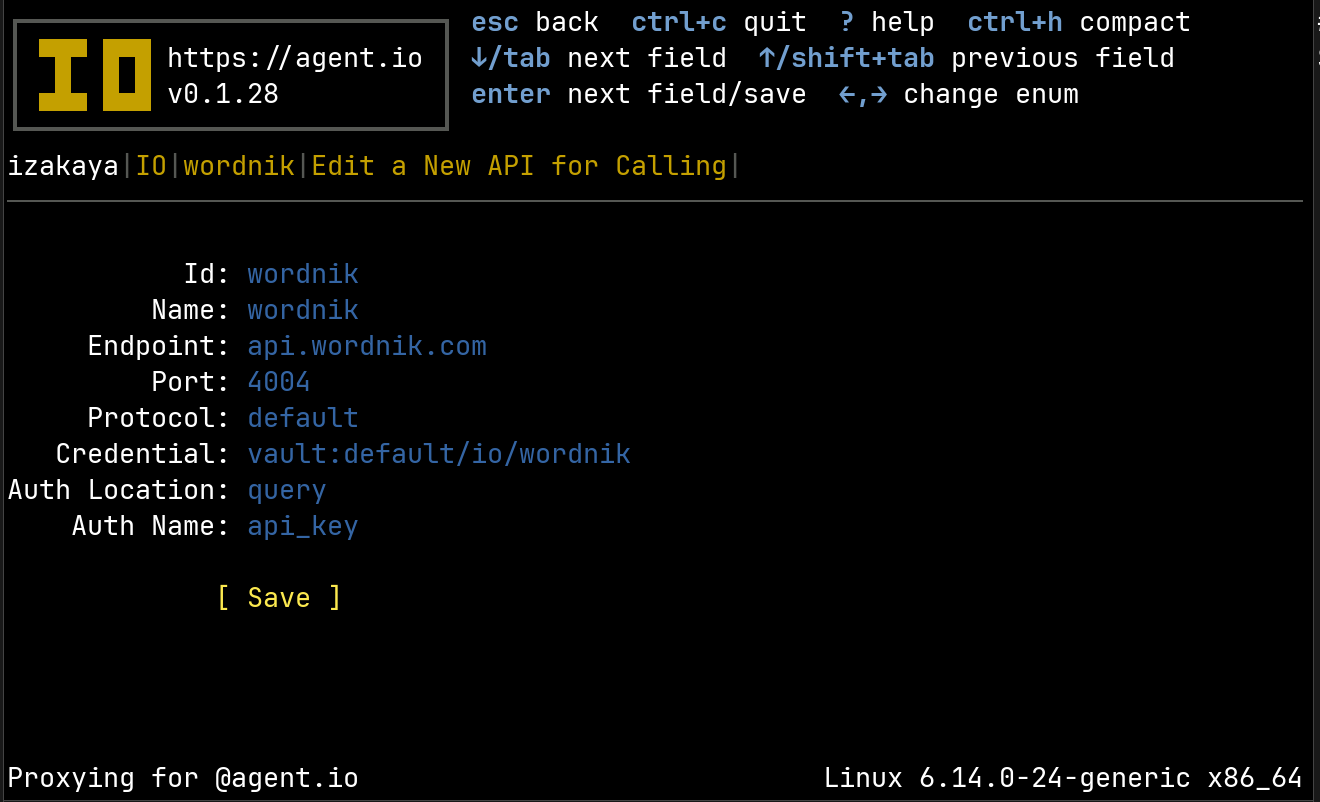
Now when our IO runs, Nomad will make a Vault token available at secrets/vault_token. IO automatically detects this and uses it to resolve secrets whose names begin with vault: So for example, the following configuration will read a Wordnik API key from default/io/wordnik:
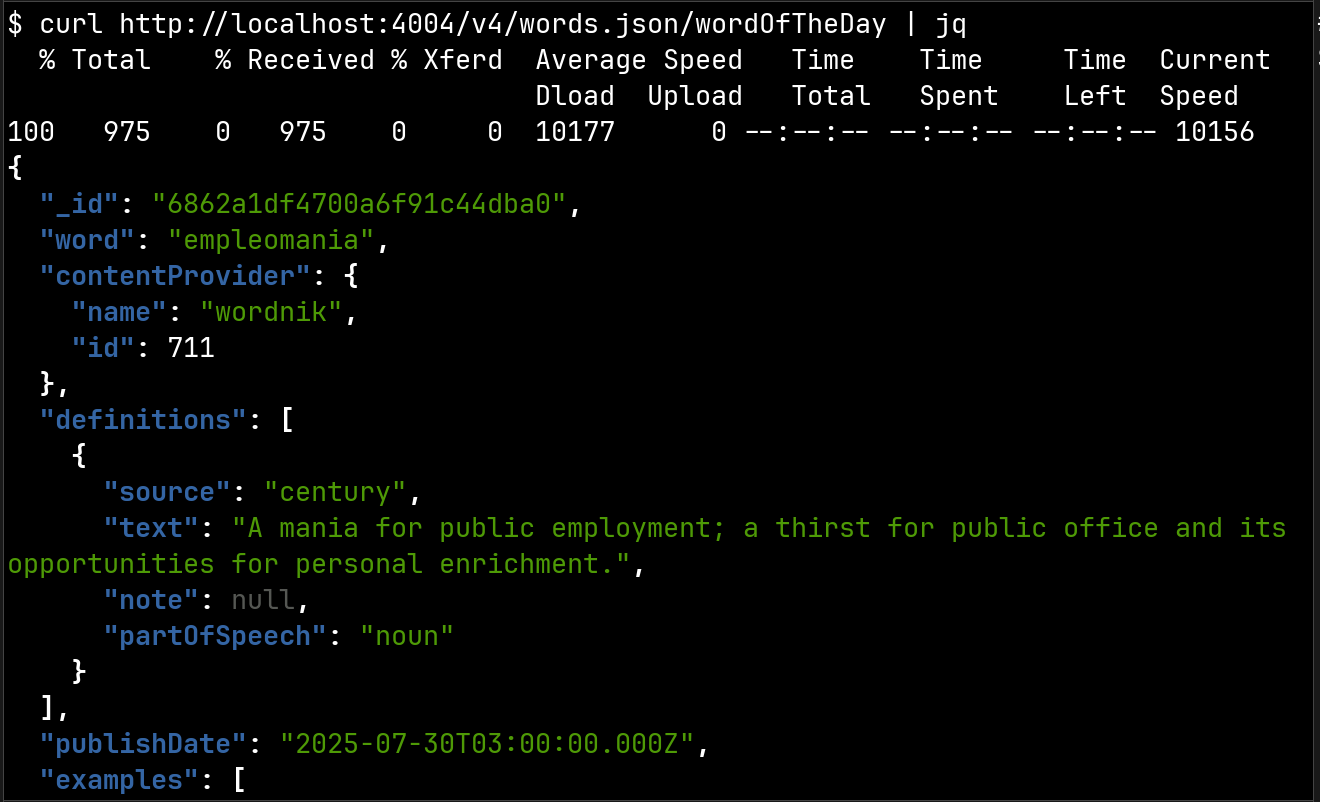
Now when we call the Wordnik API with this calling interface, IO will get the API key from the vault and apply it. The caller never sees this secret.
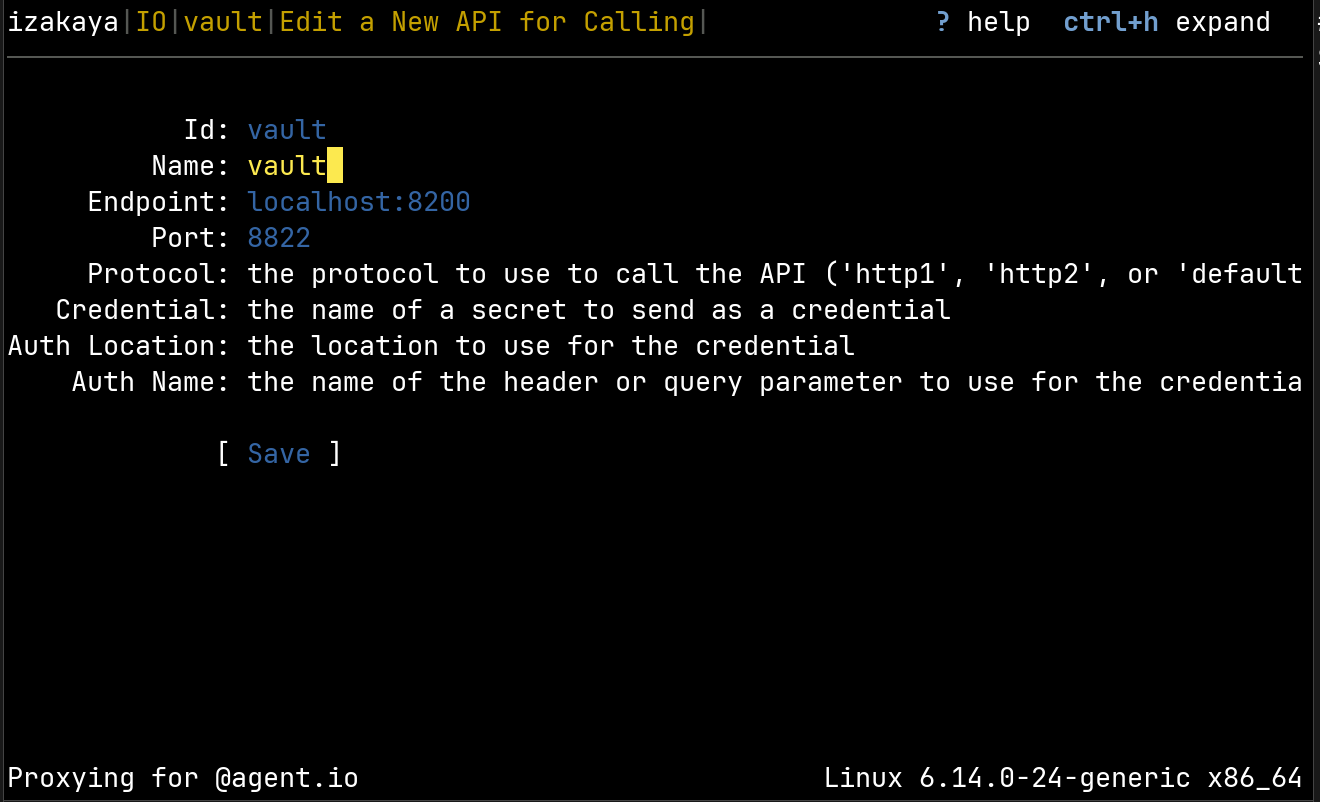
What just happened? IO used the Vault token from its environment to call the Vault API and get the Wordnik API key. Normally this would just happen behind the scenes, but to observe this, we’ve added a special feature to IO: when we create a calling interface named vault, all calls to the Vault API will be made through this interface. Here’s how we configure it:
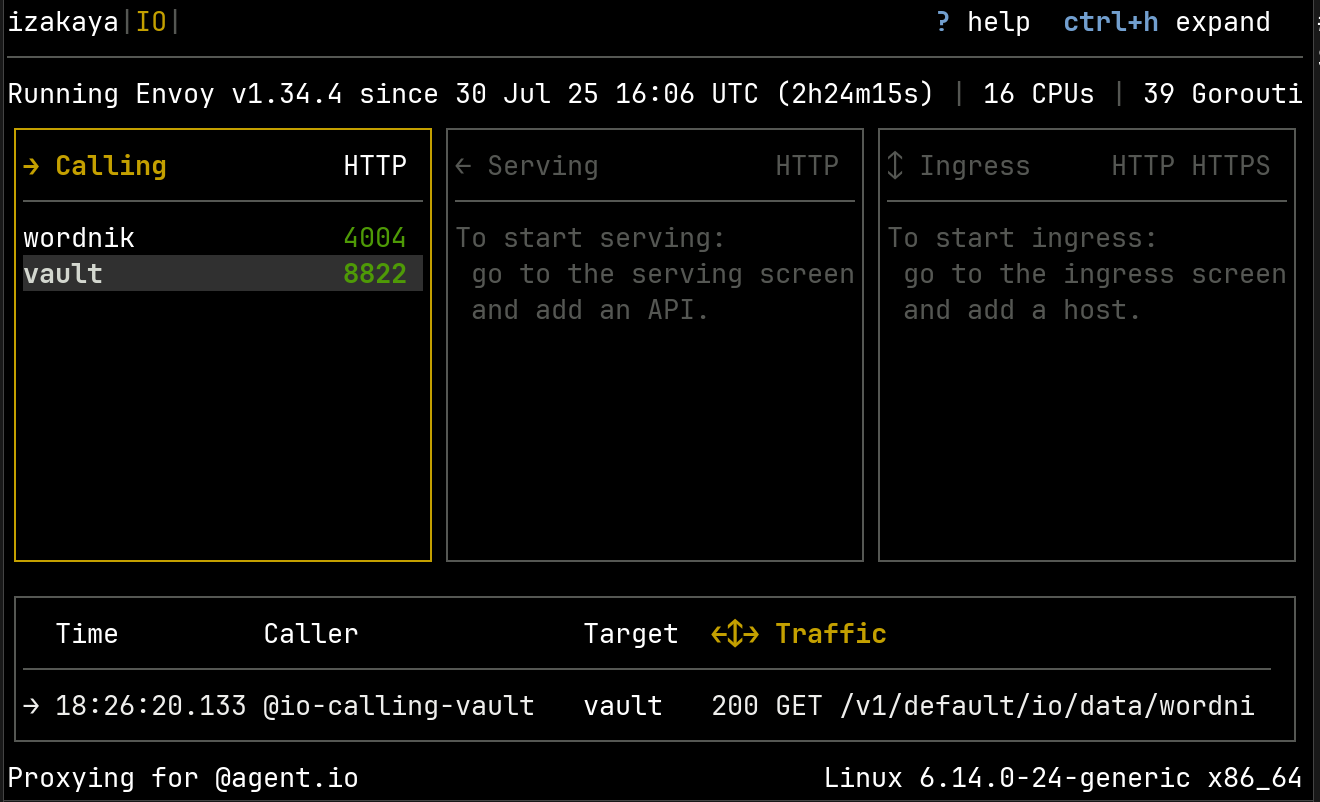
And here is our list of calling interfaces with the Vault interface added:
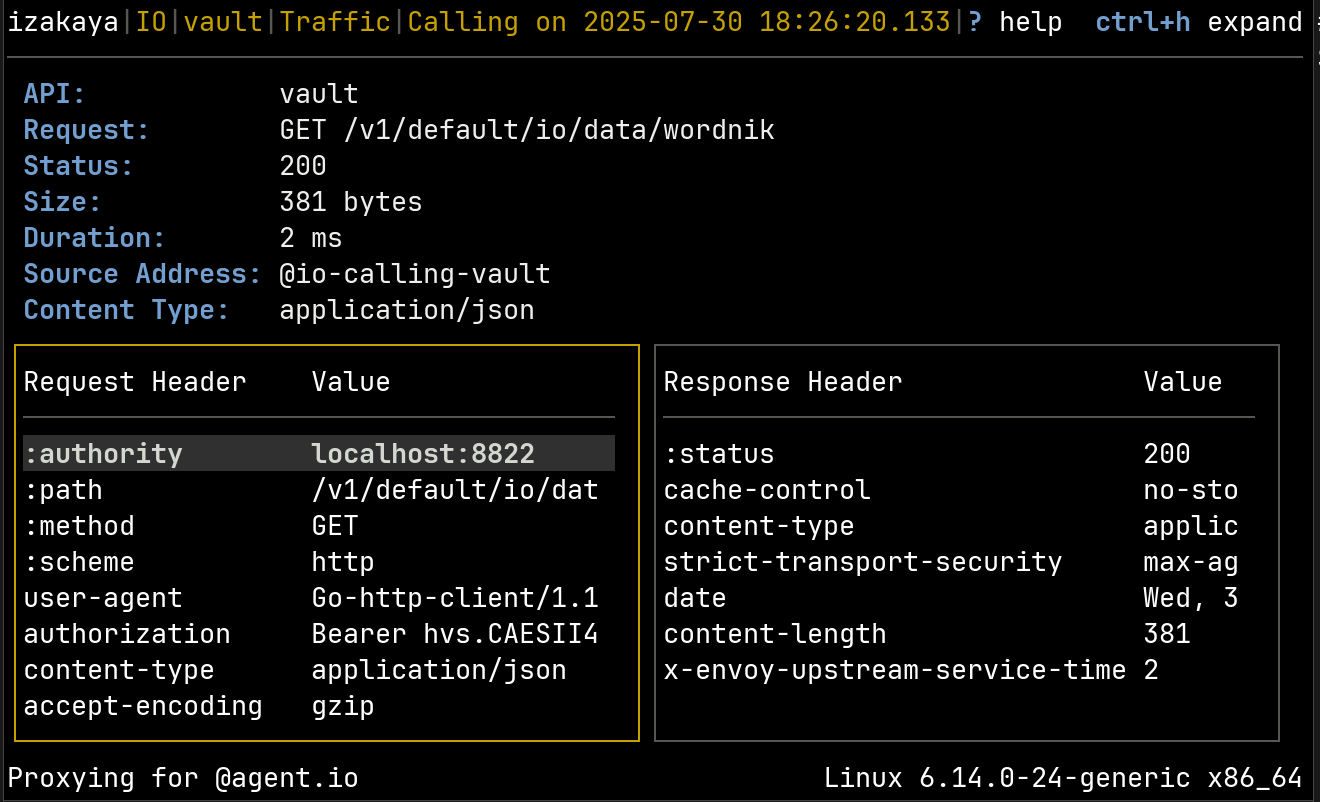
Now when we call the Wordnik API, IO’s call to the Vault API will be recorded. Here are the headers and high-level details. Notice that the authorization header (on the left) shows a fragment of our Vault token.
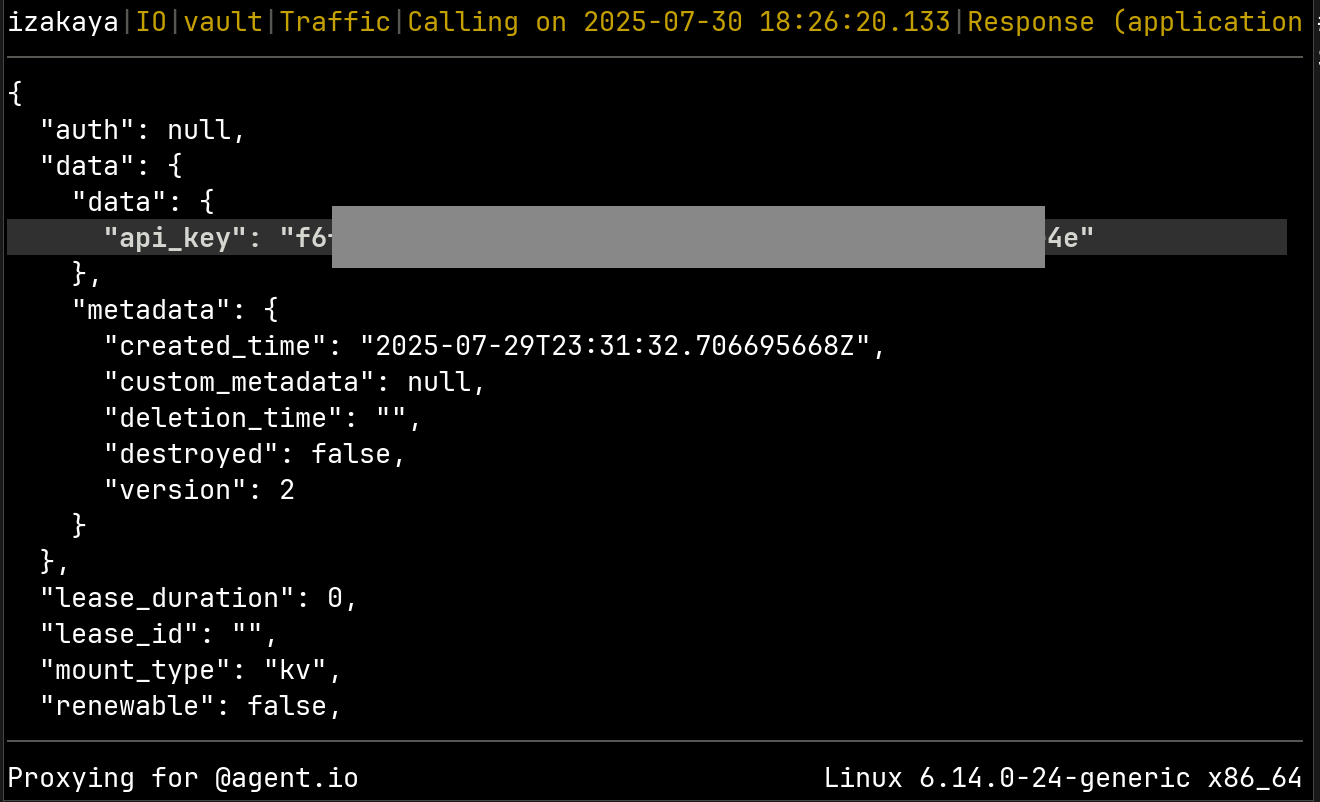
If we look at the response body, we can see the Wordnik API key (partly obscured here):
To stop recording these calls, we just delete the vault calling interface and IO will go back to calling the Vault API directly (using the VAULT_ADDR set in in its environment).
Zero-Trust API Consumption#
Now we have a way to use API keys with zero trust. IO uses its Nomad workload identity to get secrets from Vault, and using the mechanisms we’ve discussed in DIY Workload Identity, callers can use their own workload identities to call IO. This completely isolates API keys from callers and with IO, we can record all of the API calls made with these managed secrets and even apply constraints to govern them.
Appendix: Vault Configuration Details#
What did nomad setup vault do?#
The nomad setup vault command configures a Vault instance to accept Nomad workload identities. It does this with calls to the Vault API. To observe them, we set up an IO calling interface to point to our Vault and then set VAULT_ADDR to point to the IO calling interface. Then we ran nomad setup vault and observed the following traffic:
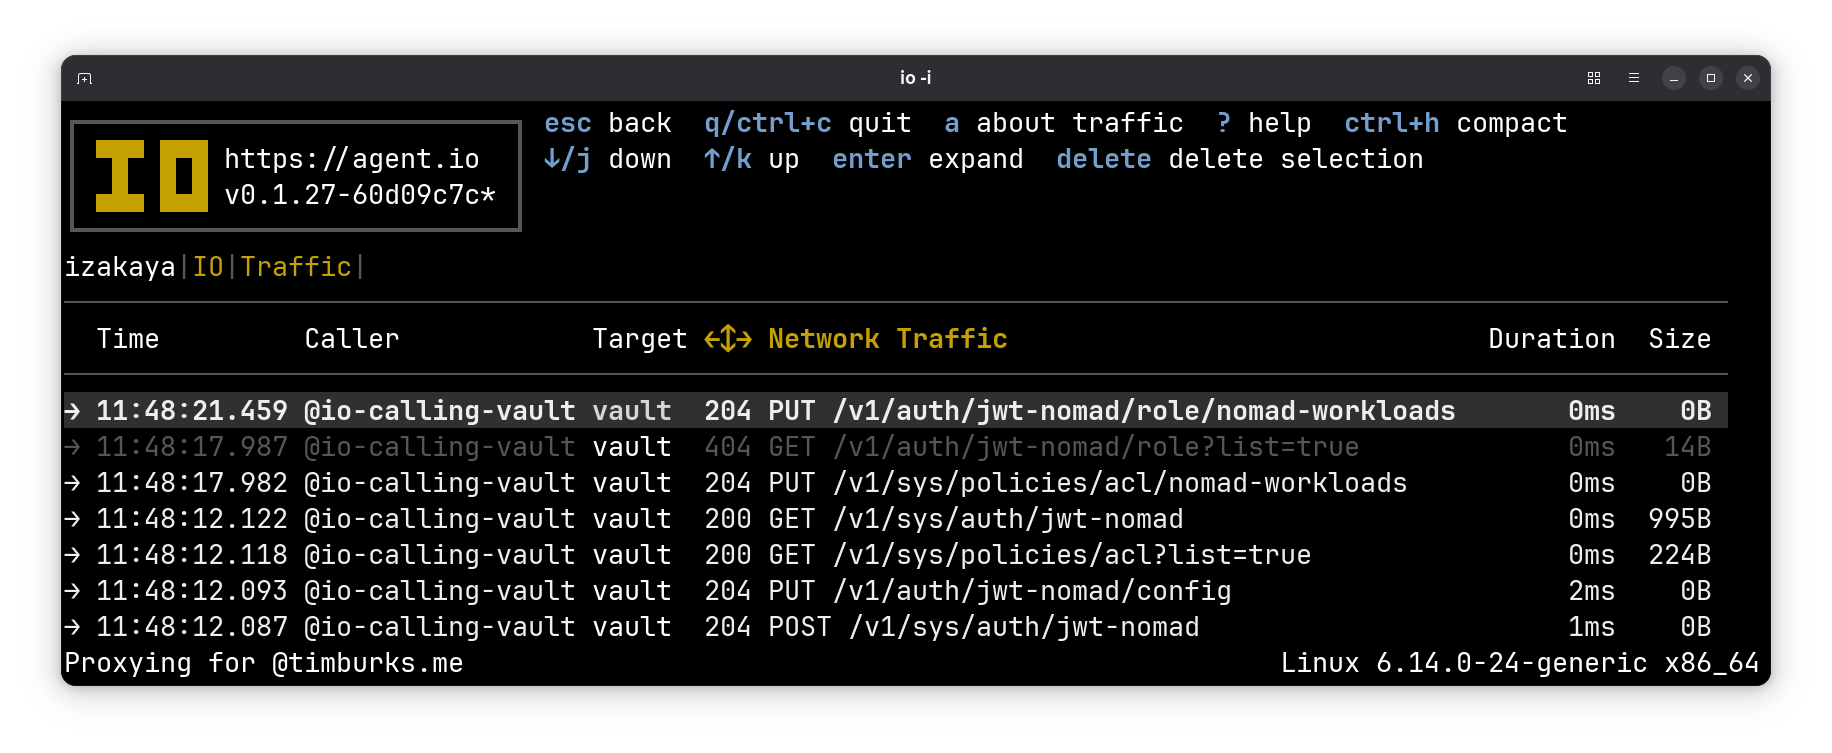
The earliest traffic is at the bottom. Let’s go through it, focusing on the POST and PUT methods.
It created a new auth method.#
The first POST is to the Enable Auth Method endpoint. This effectively creates a new authorization method with the name specified as the last segment in the path. In this case, the new auth method is named jwt-nomad.
The request is POST /v1/sys/auth/jwt-nomad and here is the request body:
{
  "type": "jwt",
  "description": "",
  "config": {
    "options": null,
    "default_lease_ttl": "",
    "max_lease_ttl": "",
    "force_no_cache": false
  },
  "local": false,
  "seal_wrap": false,
  "external_entropy_access": false,
  "options": null
}
It configured the new auth method.#
Next we upload configuration for our new auth method using the Configure endpoint.
The request is PUT /v1/auth/jwt-nomad/config and here is the request body:
{
  "default_role": "nomad-workloads",
  "jwks_url": "http://localhost:4646/.well-known/jwks.json",
  "jwt_supported_algs": [
    "EdDSA",
    "RS256"
  ]
}
It created an ACL Policy.#
Then we create a policy for our workload with Create/Update ACL Policy.
The request is PUT /v1/sys/policies/acl/nomad-workloads and here is the request body:
{
  "policy": "cGF0aCAic2VjcmV0L2RhdGEve3tpZGVudGl0eS5lbnRpdHkuYWxpYXNlcy5hdXRoX2p3dF84MTNjM2JiMC5tZXRhZGF0YS5ub21hZF9uYW1lc3BhY2V9fS97e2lkZW50aXR5LmVudGl0eS5hbGlhc2VzLmF1dGhfand0XzgxM2MzYmIwLm1ldGFkYXRhLm5vbWFkX2pvYl9pZH19LyoiIHsKICBjYXBhYmlsaXRpZXMgPSBbInJlYWQiXQp9CgpwYXRoICJzZWNyZXQvZGF0YS97e2lkZW50aXR5LmVudGl0eS5hbGlhc2VzLmF1dGhfand0XzgxM2MzYmIwLm1ldGFkYXRhLm5vbWFkX25hbWVzcGFjZX19L3t7aWRlbnRpdHkuZW50aXR5LmFsaWFzZXMuYXV0aF9qd3RfODEzYzNiYjAubWV0YWRhdGEubm9tYWRfam9iX2lkfX0iIHsKICBjYXBhYmlsaXRpZXMgPSBbInJlYWQiXQp9CgpwYXRoICJzZWNyZXQvbWV0YWRhdGEve3tpZGVudGl0eS5lbnRpdHkuYWxpYXNlcy5hdXRoX2p3dF84MTNjM2JiMC5tZXRhZGF0YS5ub21hZF9uYW1lc3BhY2V9fS8qIiB7CiAgY2FwYWJpbGl0aWVzID0gWyJsaXN0Il0KfQoKcGF0aCAic2VjcmV0L21ldGFkYXRhLyoiIHsKICBjYXBhYmlsaXRpZXMgPSBbImxpc3QiXQp9Cg=="
}
That’s not very informative! The policy value is a base64 encoded string, so let’s decode it.
$ jq < acl.json .policy -r | base64 -d
path "secret/data/{{identity.entity.aliases.auth_jwt_813c3bb0.metadata.nomad_namespace}}/{{identity.entity.aliases.auth_jwt_813c3bb0.metadata.nomad_job_id}}/*" {
  capabilities = ["read"]
}

path "secret/data/{{identity.entity.aliases.auth_jwt_813c3bb0.metadata.nomad_namespace}}/{{identity.entity.aliases.auth_jwt_813c3bb0.metadata.nomad_job_id}}" {
  capabilities = ["read"]
}

path "secret/metadata/{{identity.entity.aliases.auth_jwt_813c3bb0.metadata.nomad_namespace}}/*" {
  capabilities = ["list"]
}

path "secret/metadata/*" {
  capabilities = ["list"]
}
It created the workload role.#
Finally, we define the nomad-workloads role with Create/Update Role:
The request is PUT /v1/auth/jwt-nomad/role/nomad-workloads and here is the request body:
{
  "bound_audiences": "vault.io",
  "claim_mappings": {
    "nomad_job_id": "nomad_job_id",
    "nomad_namespace": "nomad_namespace",
    "nomad_task": "nomad_task"
  },
  "role_type": "jwt",
  "token_period": "30m",
  "token_policies": [
    "nomad-workloads"
  ],
  "token_type": "service",
  "user_claim": "/nomad_job_id",
  "user_claim_json_pointer": true
}
Recall that our Nomad configuration specifies a “backend path” that is essentially the name of our auth method and a default identity that uses the audience that we specified for our role.
vault {
  enabled = true
  address = "http://localhost:8200"
  jwt_auth_backend_path = "jwt-nomad/"

  default_identity {
    aud = ["vault.io"]
    ttl = "1h"
  }
}
Nomad job configurations that request a token include the name of the Vault role specified above, nomad-workloads.
job "cat" {
  datacenters = ["dc1"]
  type = "batch"
  group "app" {
    task "cat" {
      driver = "exec"
      config {
        command = "/usr/bin/cat"
        args = ["secrets/vault_token"]
      }
      vault {
        role = "nomad-workloads"
      }
    }
  }
}